


The art of Kavad painting originated in the Mewar region of Rajasthan and is a traditional form of storytelling using a portable shrine. The Kavad is a three-dimensional wooden box that is painted on all sides and used to narrate mythological stories through a series of interconnected panels. In this tutorial, we will take you through the step-by-step process of making a Kavad, from preparing the wooden box to the final touches. So, let's get started and explore the captivating world of Kavad painting!
1. Crafting the Wood Box
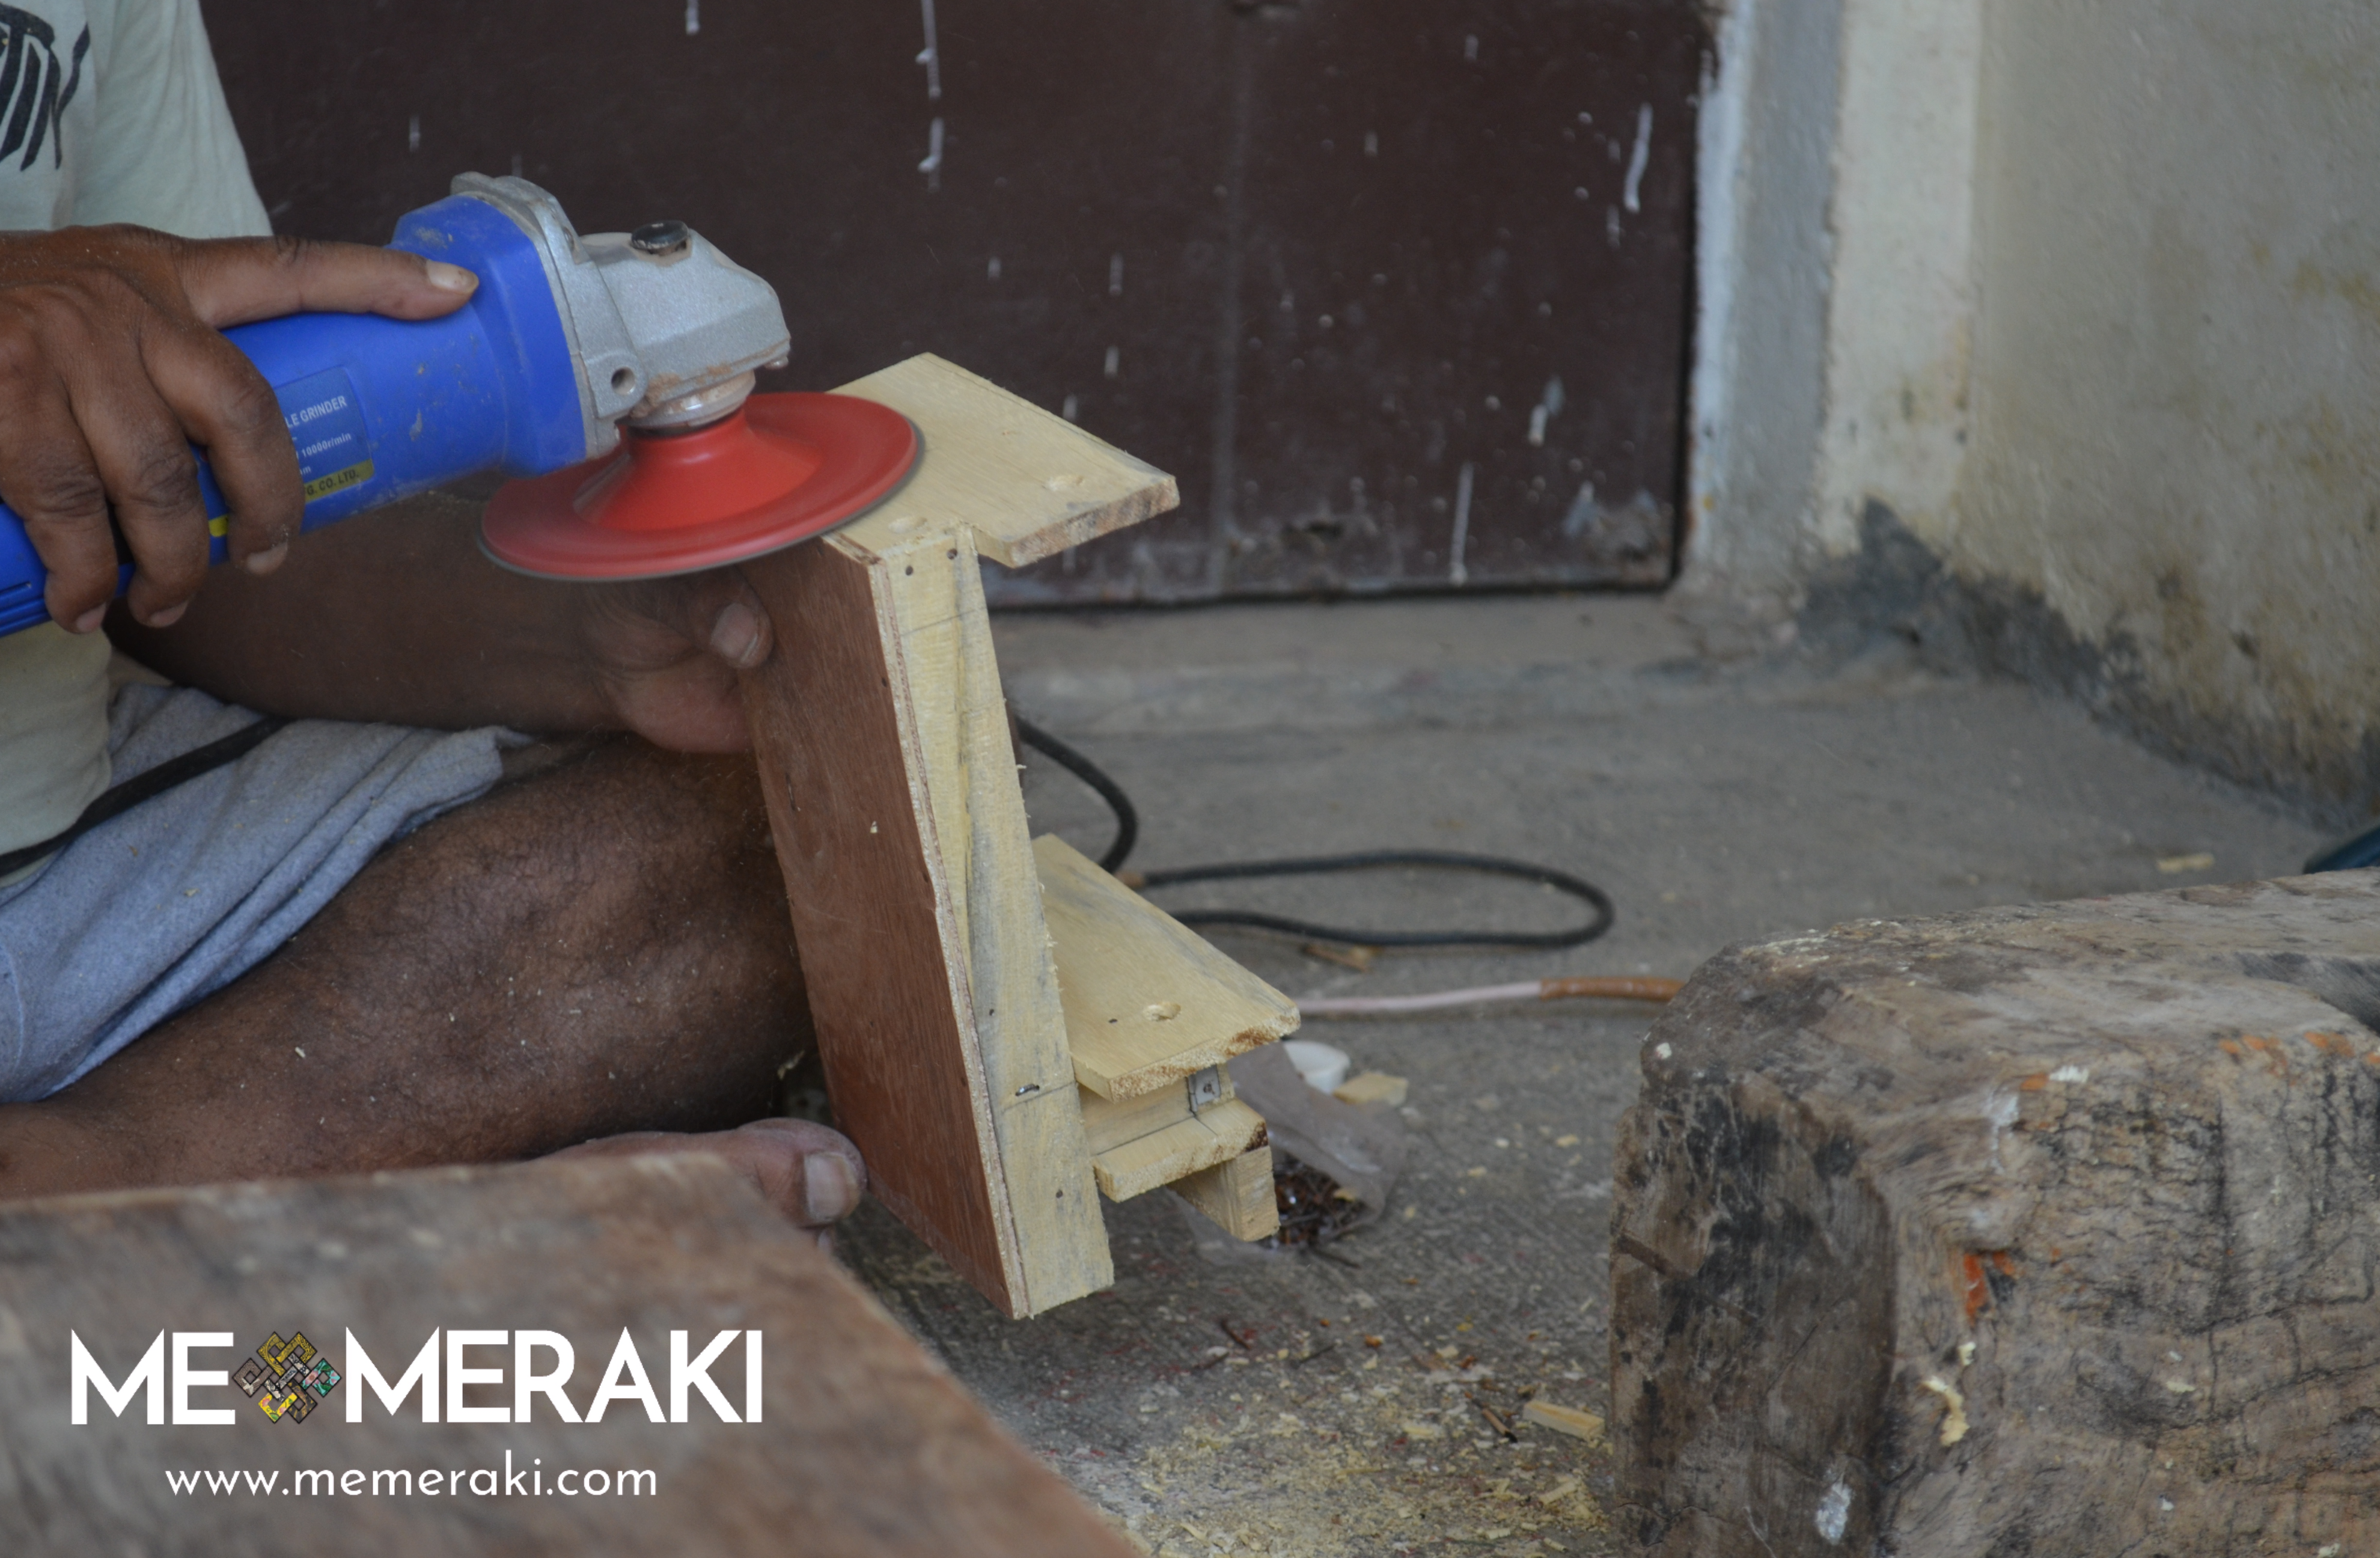
The first step to make a Kavad is building a wooden structure, or portable temple on which the story will be painted. It is important to choose the right kind of wood before making a Kavad. Our Kavad master artist Satyanarayan Suthar purchases Adusa trees from local villagers. The tree is then chopped, and processed into wooden planks according to the proportions given by the artist.
The planks are further prepared by the artists by an anti—termite treatment, and sun-dried. This process takes about 10 days. Once the wood is ready, it is shaped to meet the design of the Kavad.
However, for most it may not be possible to source wood in the same way as traditional Kavad artists. Instead, consider looking for a local lumber yard or woodworking shop where you can purchase the necessary materials. Once you have sourced the appropriate wood, you can either shape the Kavad yourself if you have the necessary tools and skills, or work closely with a carpenter to replicate its structure.
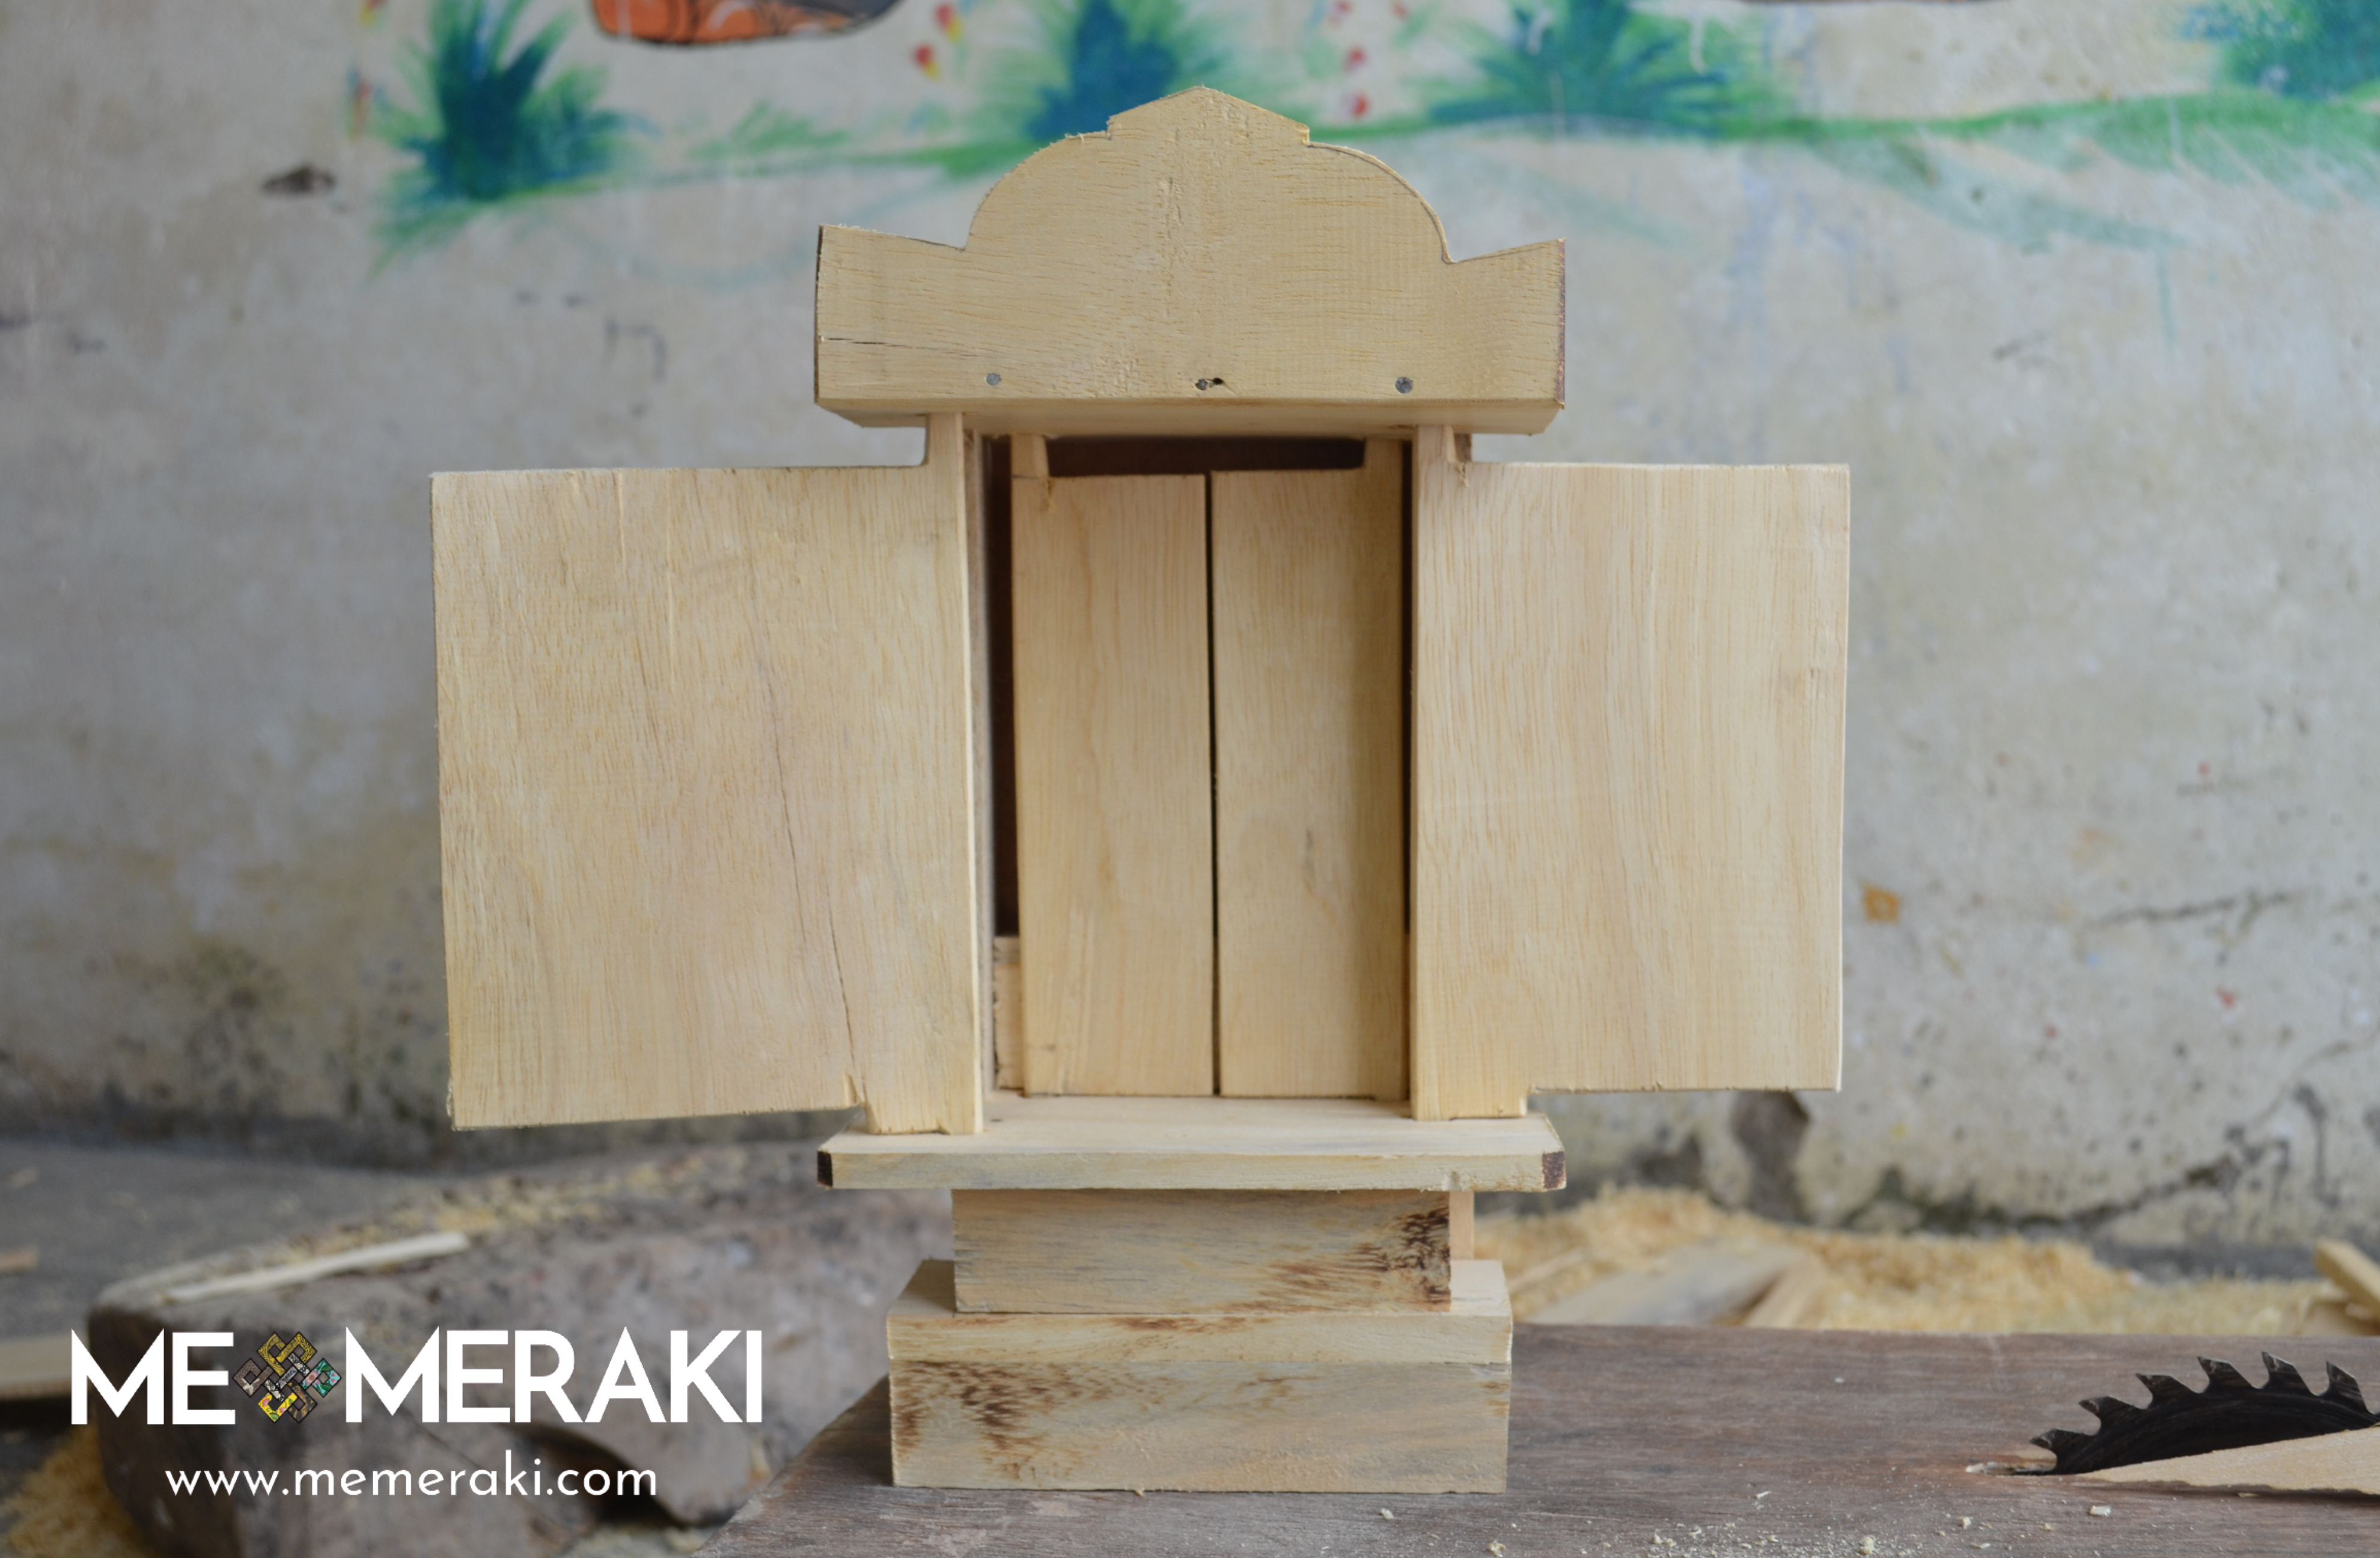
2. Painting the Base
Once the structure of the Kavad is ready, it is coated with putty, or plaster and polished. To get putty for your Kavad, you can try looking at local hardware stores or art supply stores. You may also be able to find putty at specialty woodworking stores. Additionally, you can search for putty online through retailers like Amazon or Etsy.
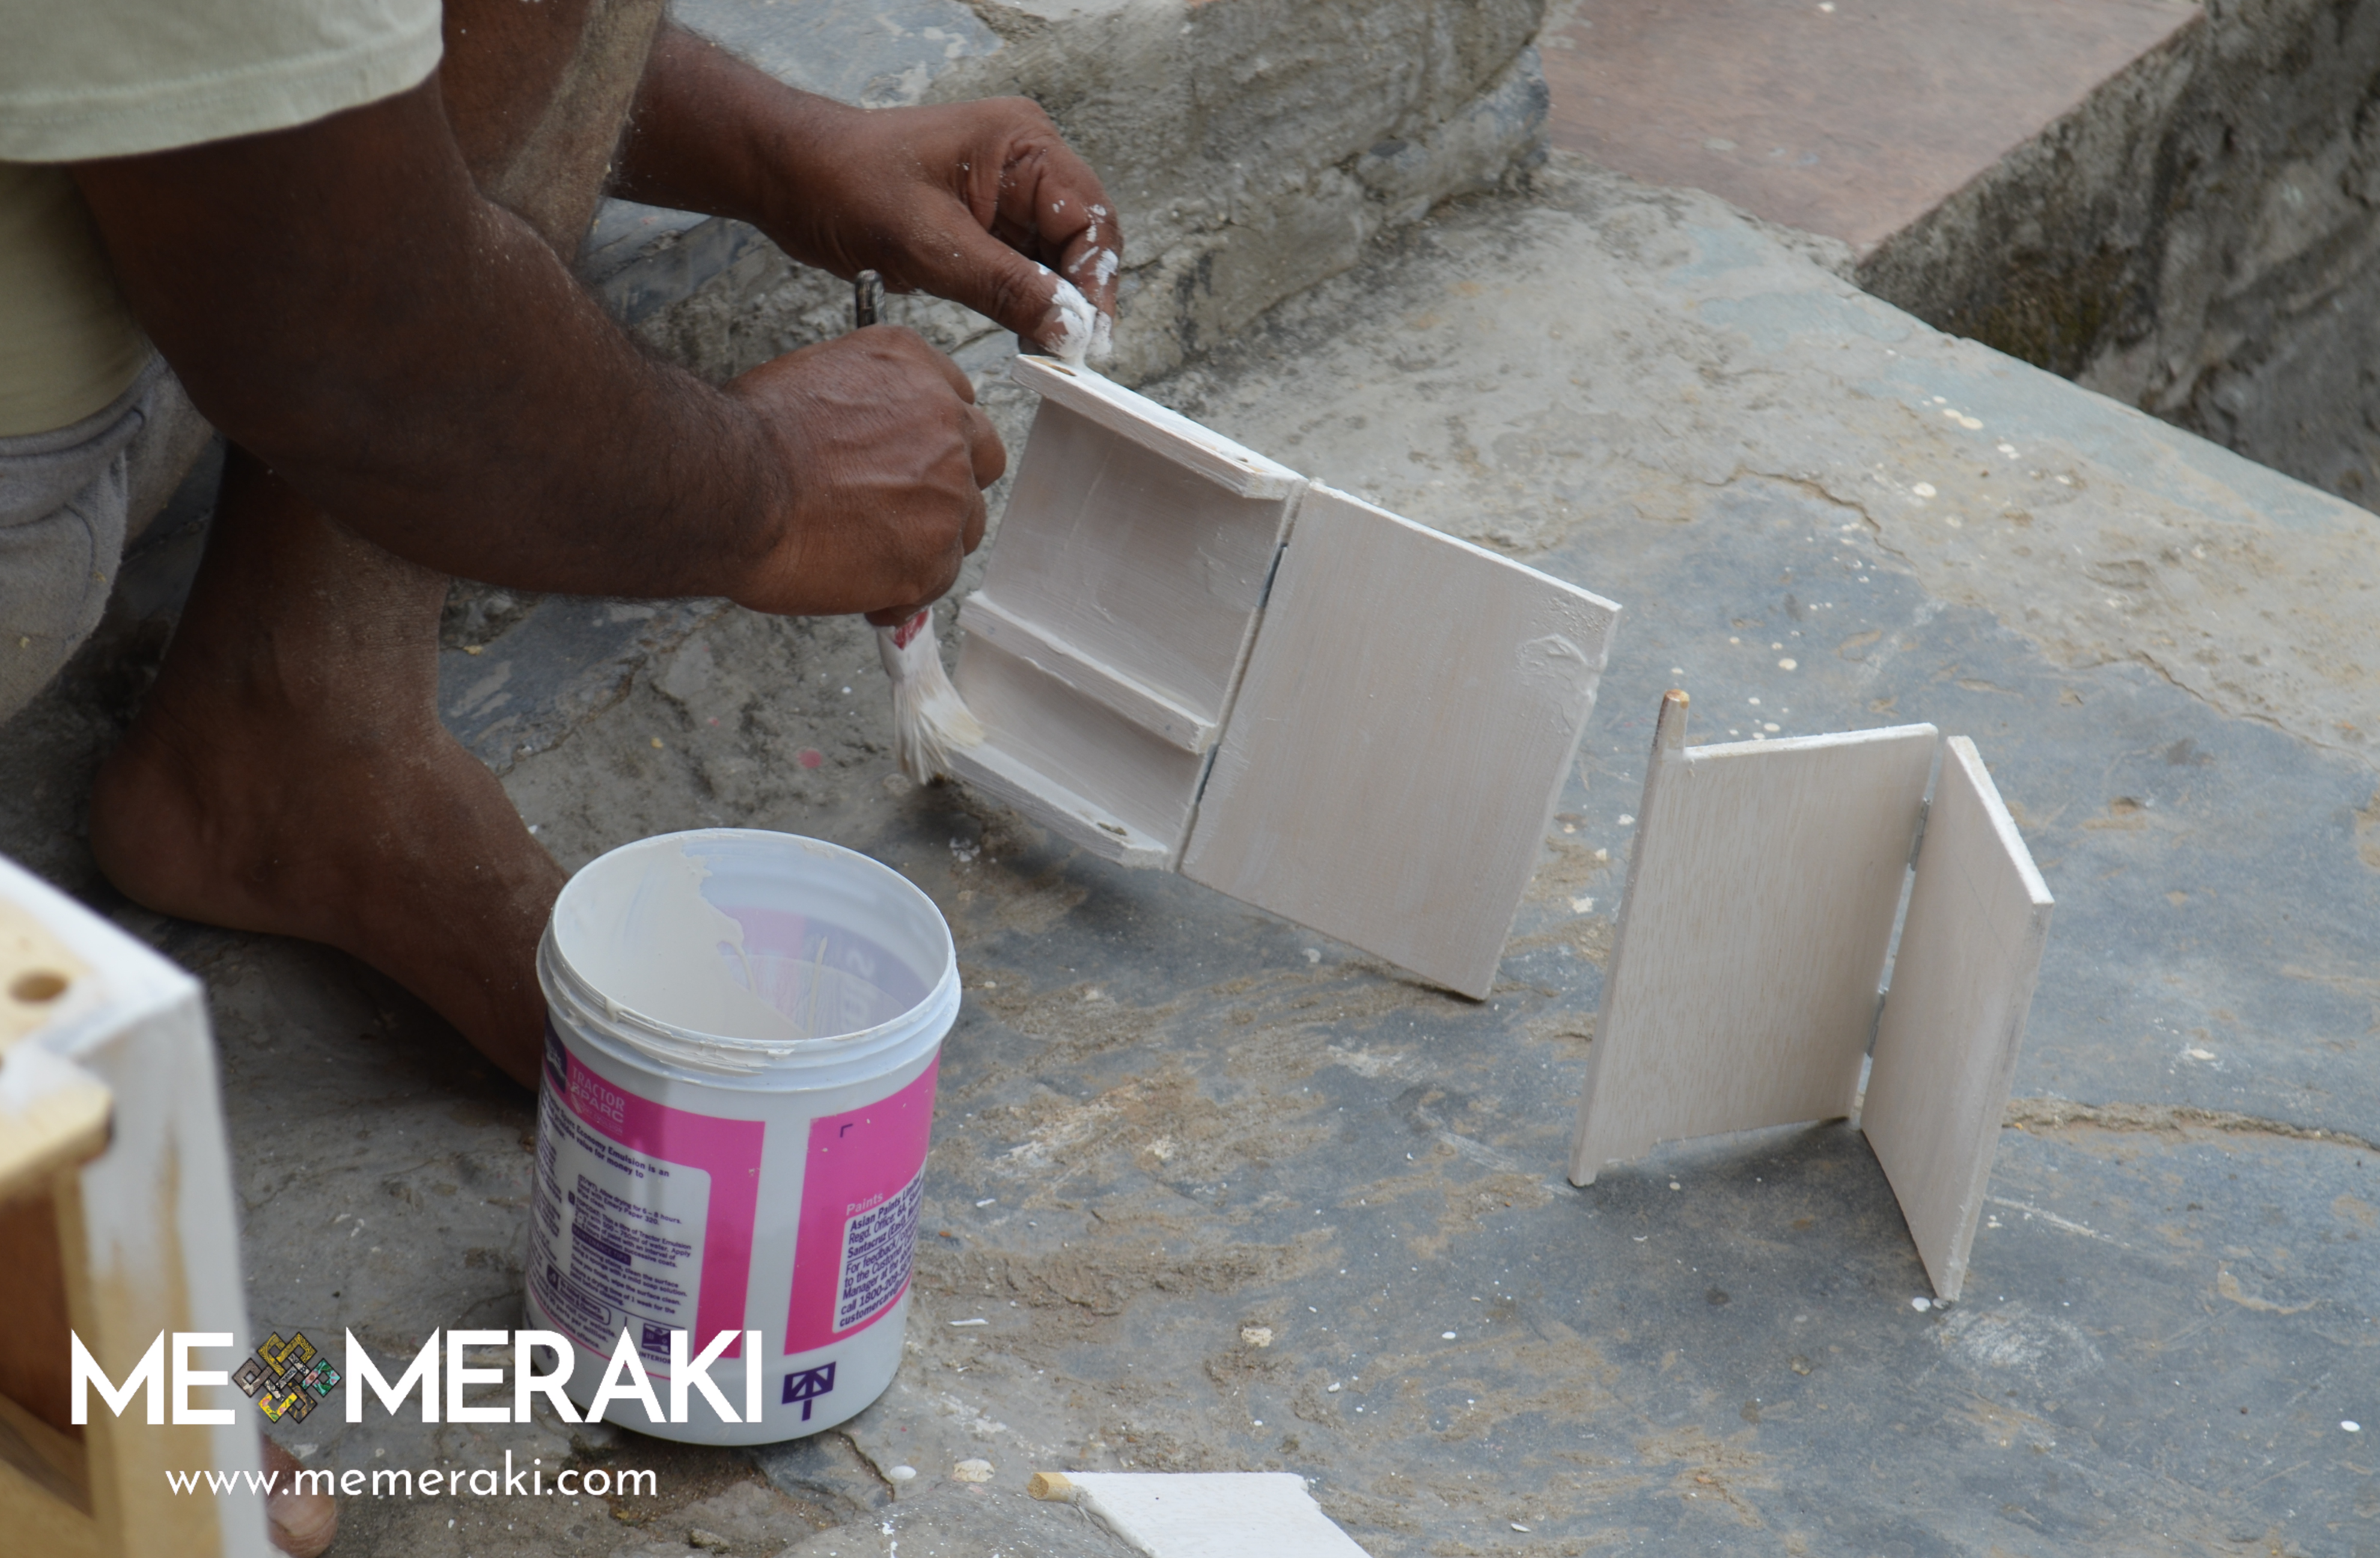
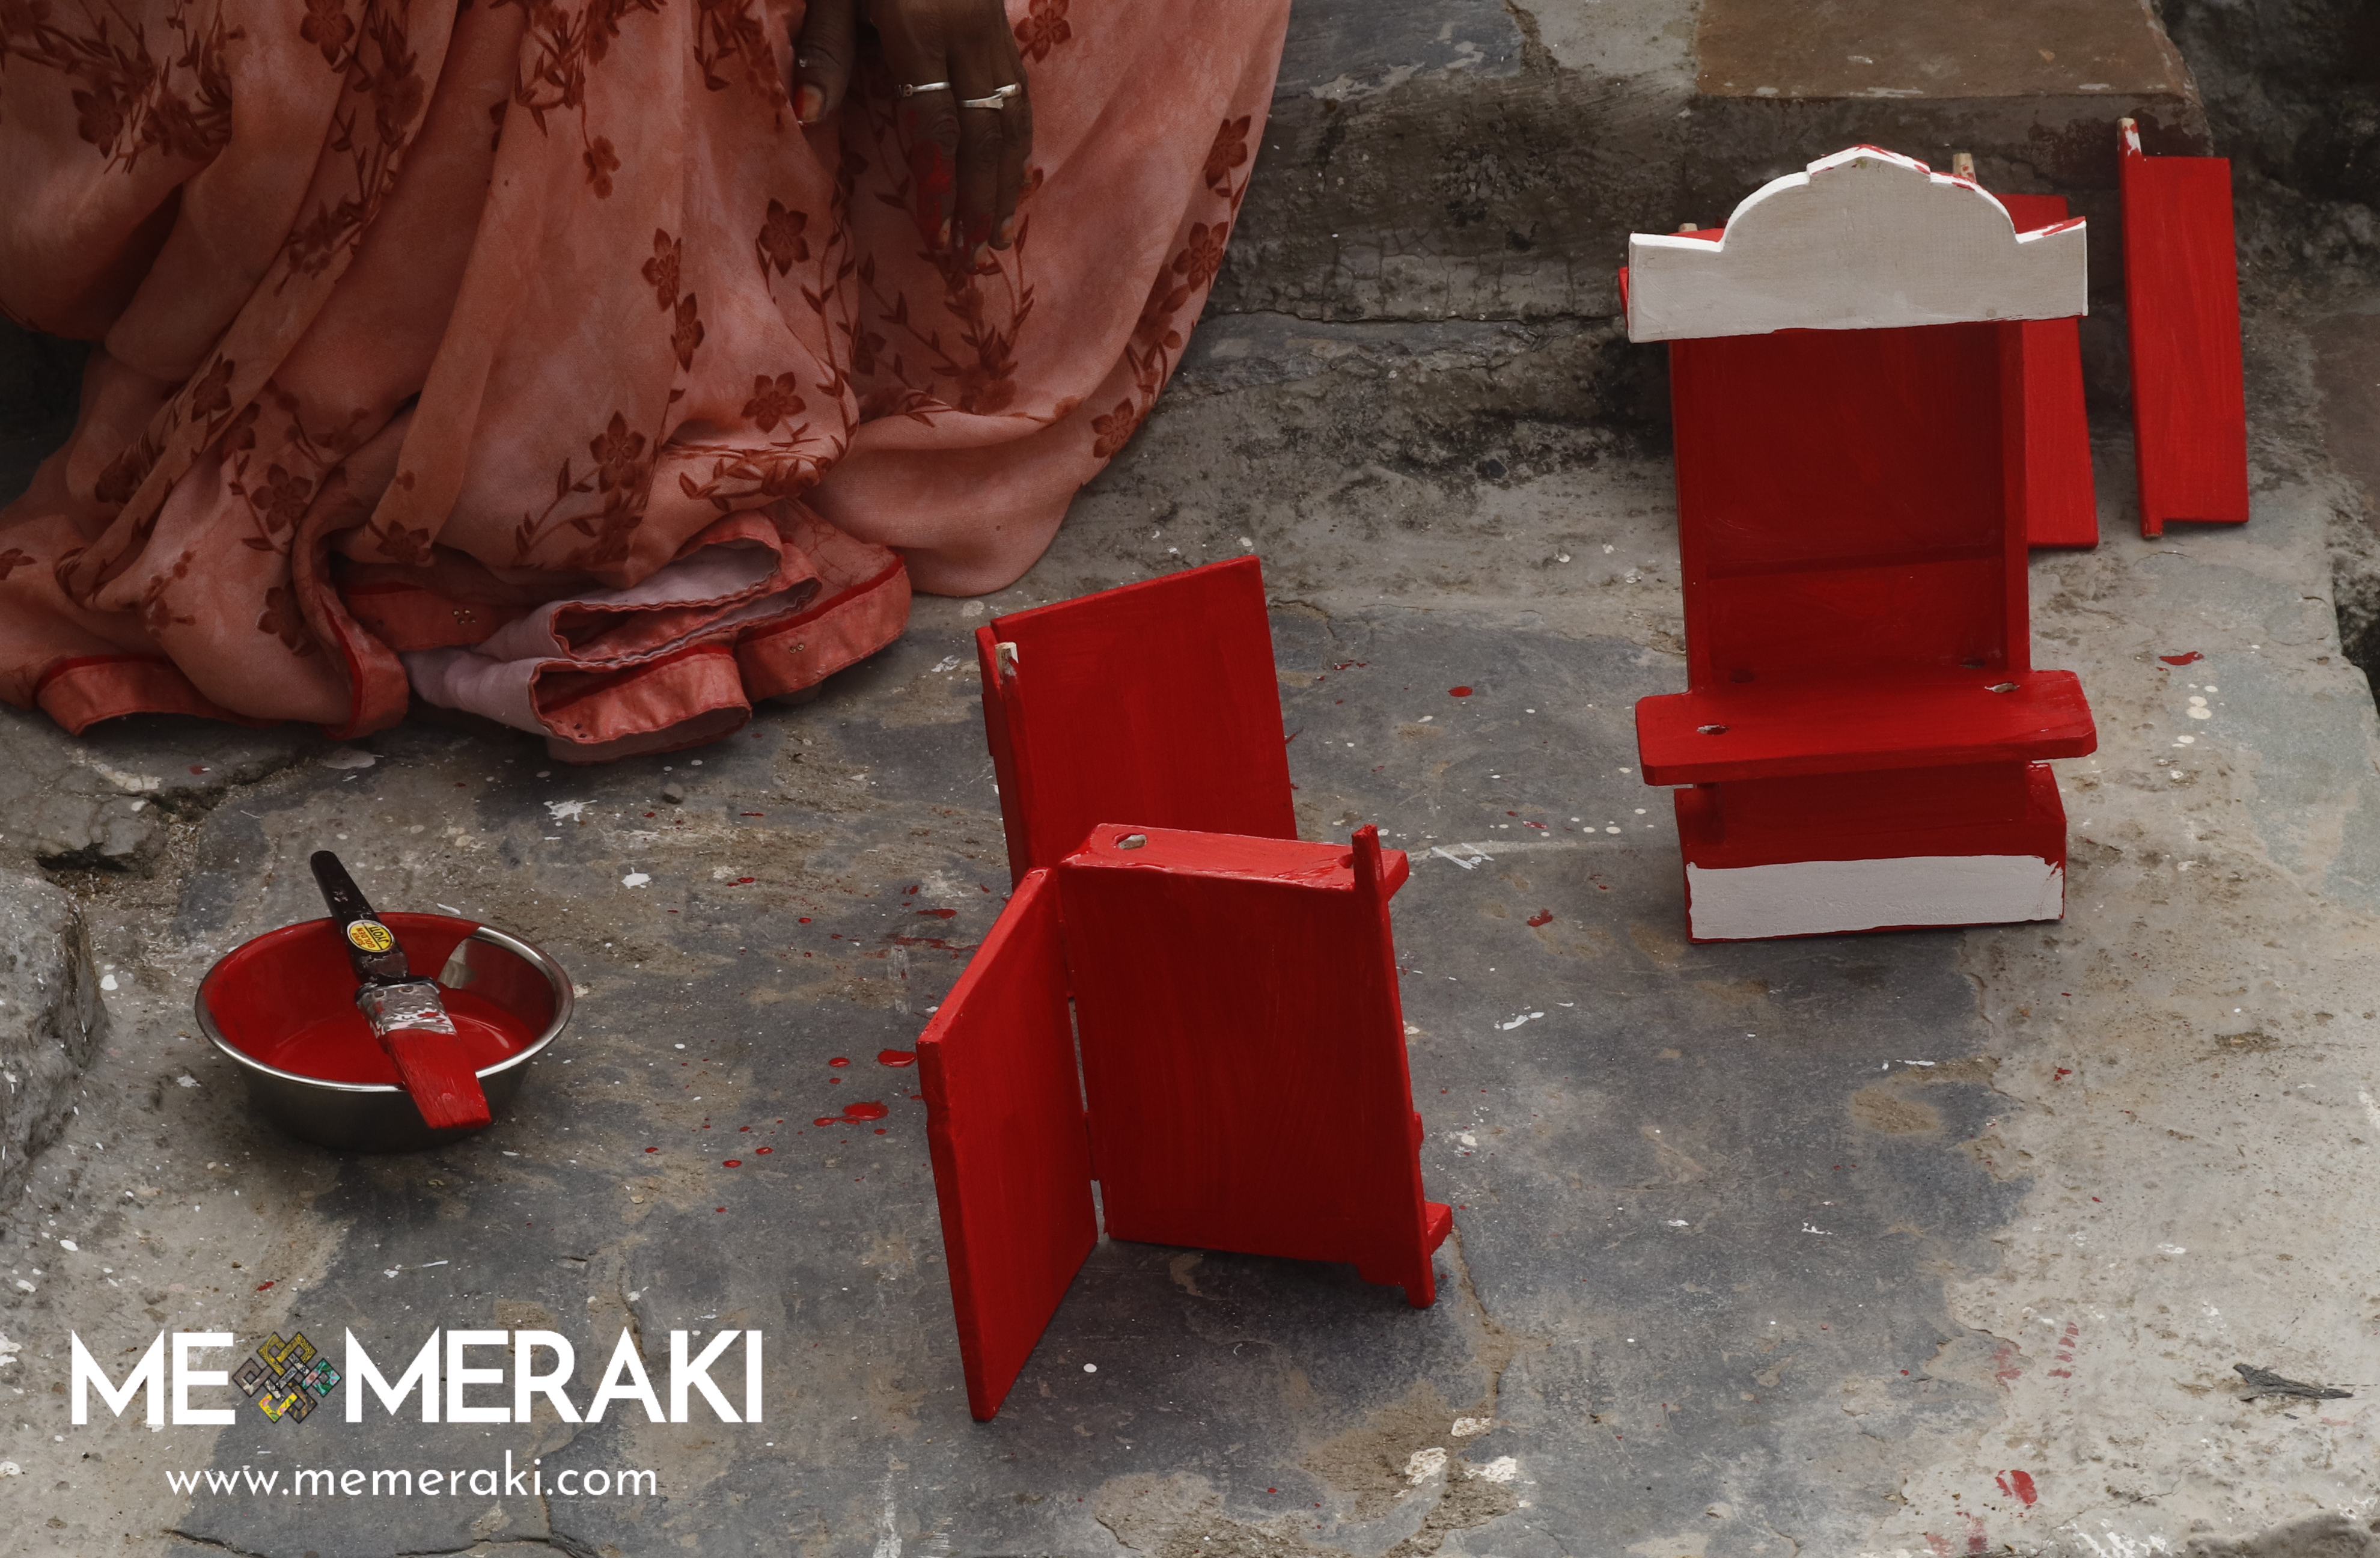
The next step after that is to coat it with white paint and polish it. This step is repeated twice before we continue to paint the structure with its colour. Red is often a popular choice for a classic Kavad, but you can choose any colour as the base coat, depending on the story you are illustrating. Two coats of the base colour are given to get the perfect shine.
For traditional paint, you can purchase an art kit from online stores such as Memeraki. However, it's important to note that traditional paint can be quite expensive, so alternative options such as acrylic or poster paint from local craft or art stores can be used instead. These paints are more affordable and readily available, making them a good option for beginners.
If the process of making a Kavad from scratch seems intimidating to you, don't worry. You can order a ready-made base Kavad from Master Artist Satyanarayan Suthar. He can take care of all the steps mentioned above for you, except the base color paint. This means that you can skip right to the sketching and painting. If you are short on time or don't have the tools and resources to make a Kavad from scratch, this could be a great option for you!
3. Planning and Dividing the Story
The third step in making a Kavad is to think about the story that will be illustrated on the different sections of the structure. The Kavad is essentially a mobile storytelling device, so it's important to have a clear understanding of the narrative and the order in which the events occur. Once the story is understood, it must be divided appropriately so that the events can be illustrated sequentially in the sections. This involves determining which events will be depicted on which doors, walls or panels of the structure, and ensuring that the overall flow of the story is logical and coherent.
You can consider researching traditional stories or folk tales from your culture and selecting one that you would like to depict. Alternatively, you could create your own story that reflects your personal experiences or values. It's important to keep in mind that the story will be the heart of the Kavad and will be what draws the viewer in, so careful thought and consideration must be given to this step. Once the story is clear, we will take the paintbrush to the wood.
4. Painting Borders: Organizing Your Kavad Story
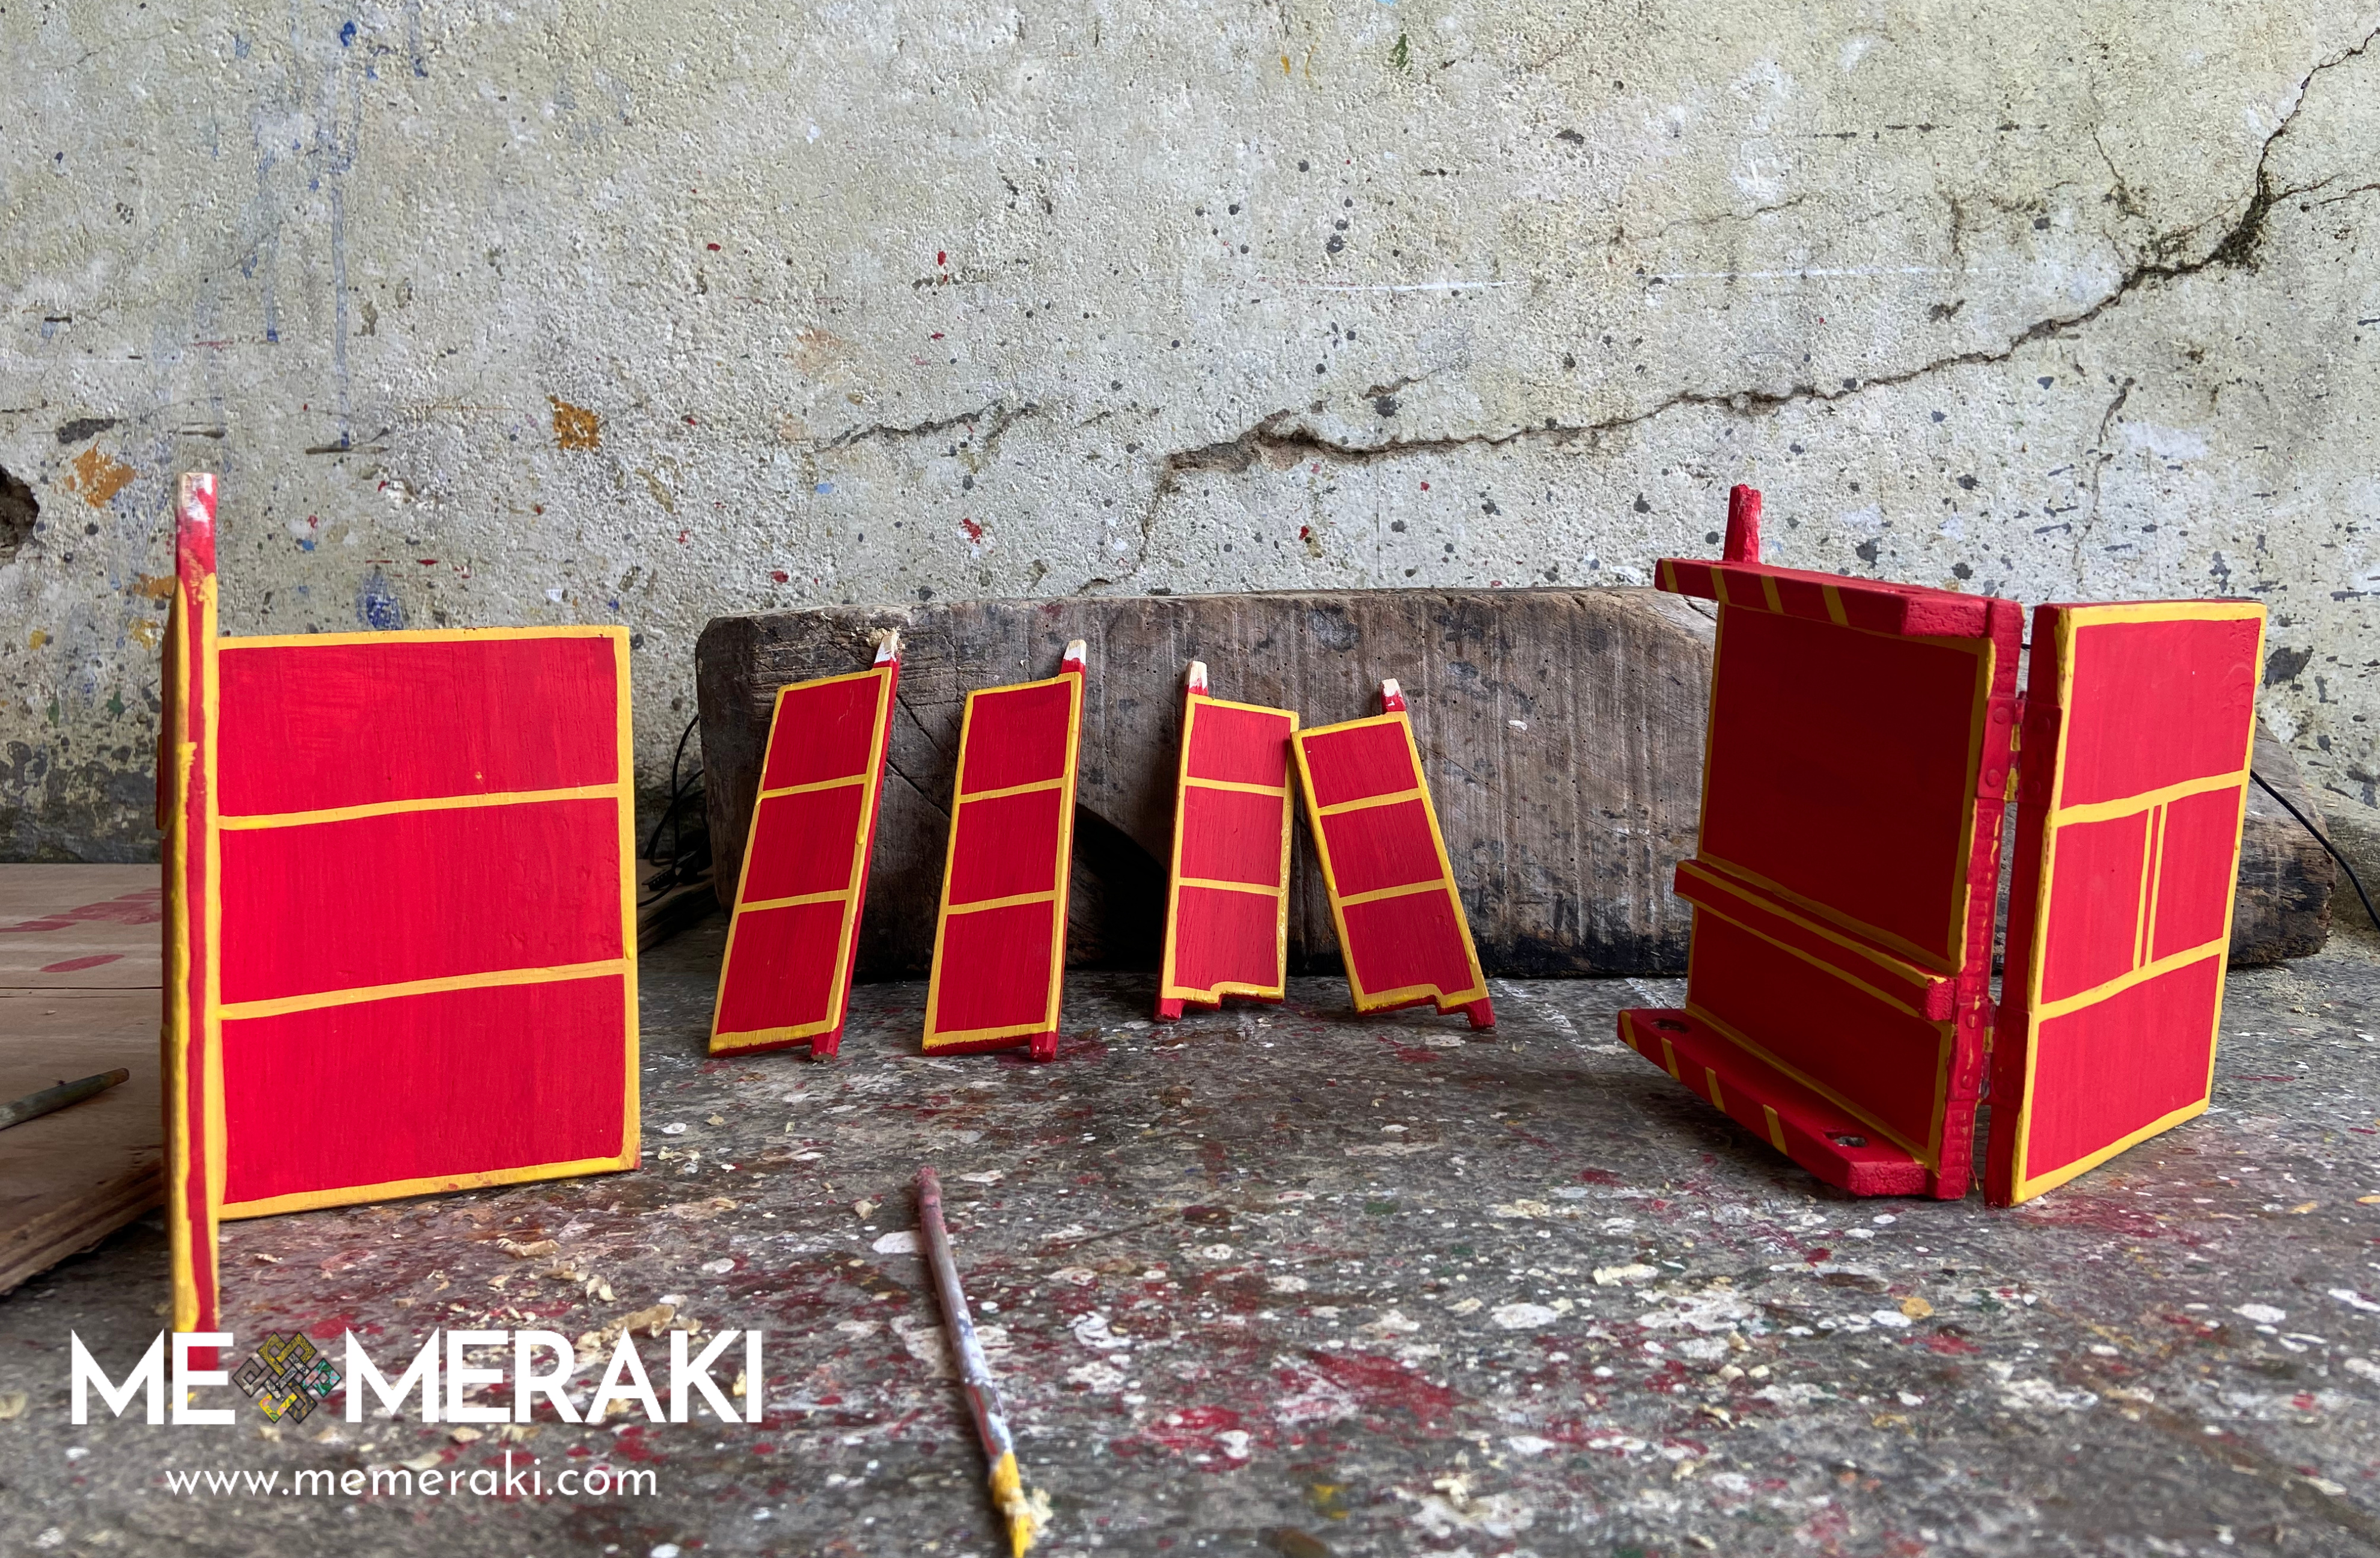
Once you have divided your story into segments, the next step is to divide the panels into different sections. This is an important step as it helps to organize the narrative into a coherent sequence of events. For instance, a two-door Kavad typically has two sections, while a three-door Kavad has three sections. You can also divide the sections based on the number of sequences your story has.
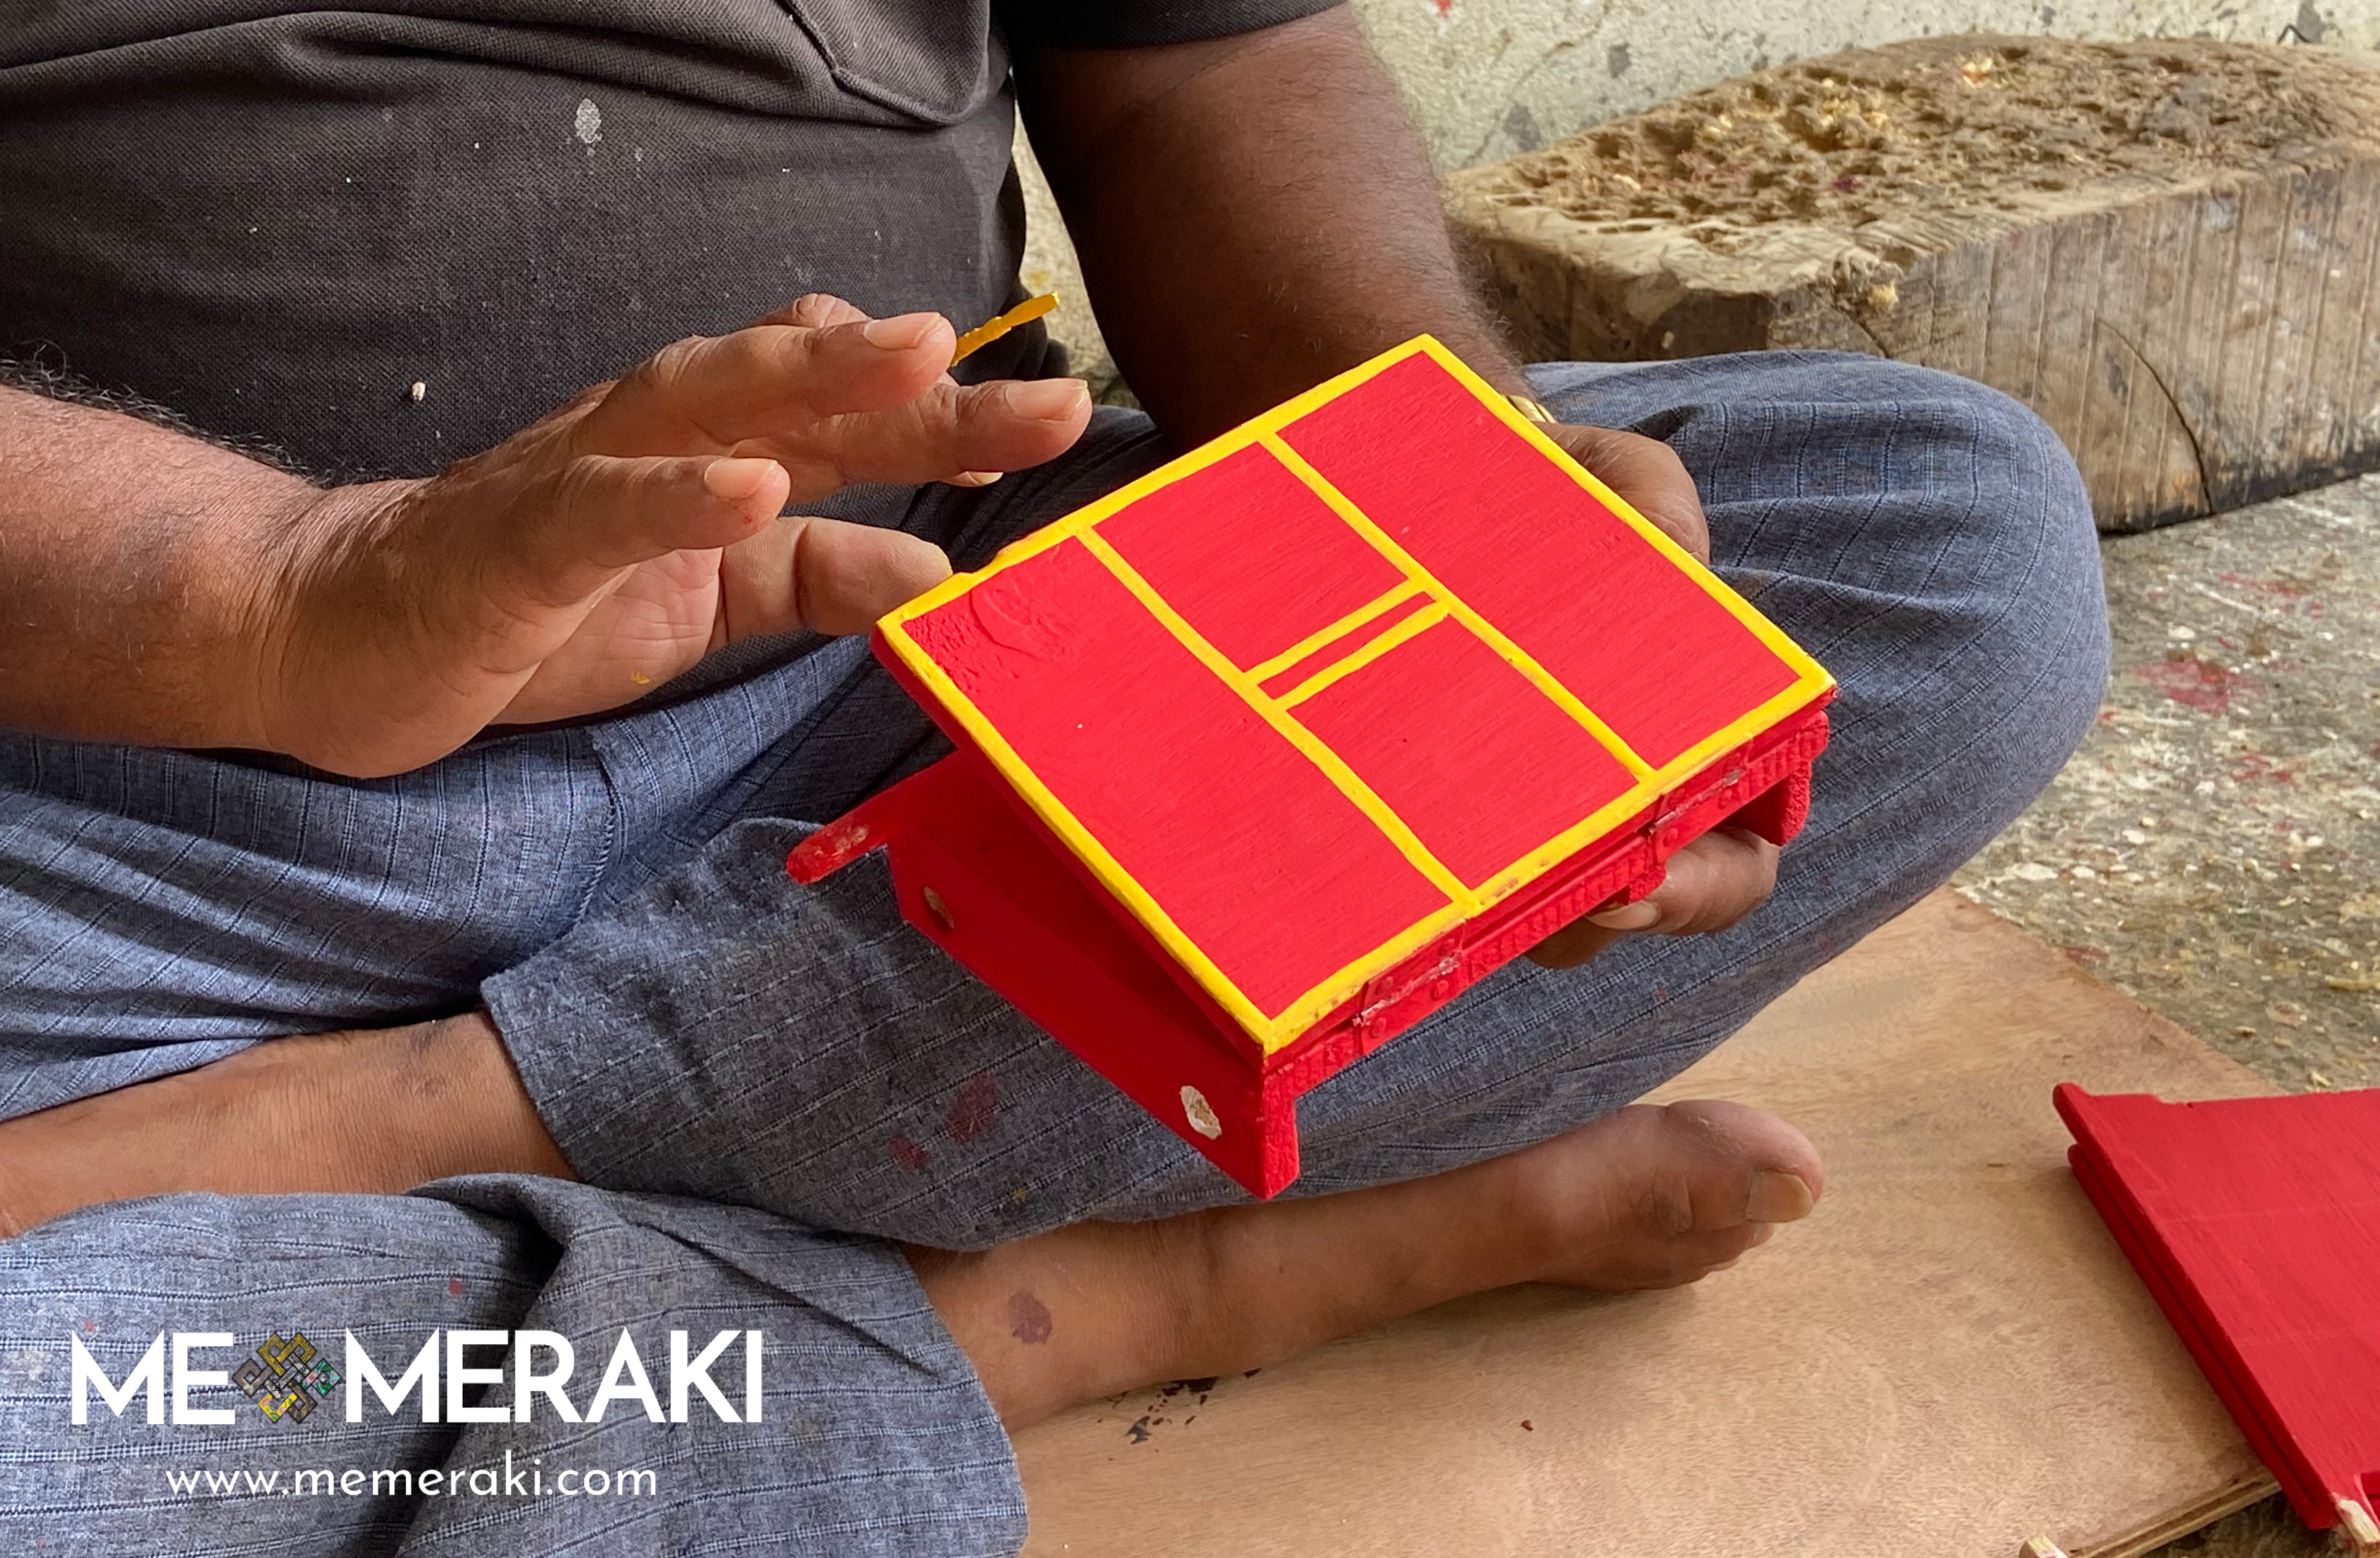
After deciding on the number of sections, the next step is to demarcate them with paint. This includes making partition lines on the panels, as well as borders on the whole structure. Many Kavad artists prefer to use bright colors to draw attention to their work. Yellow paint is often a popular choice for a red Kavad as it creates a striking contrast. The sections should be clearly marked so that viewers can easily follow the story from one section to the next.
5. Sketching the Story
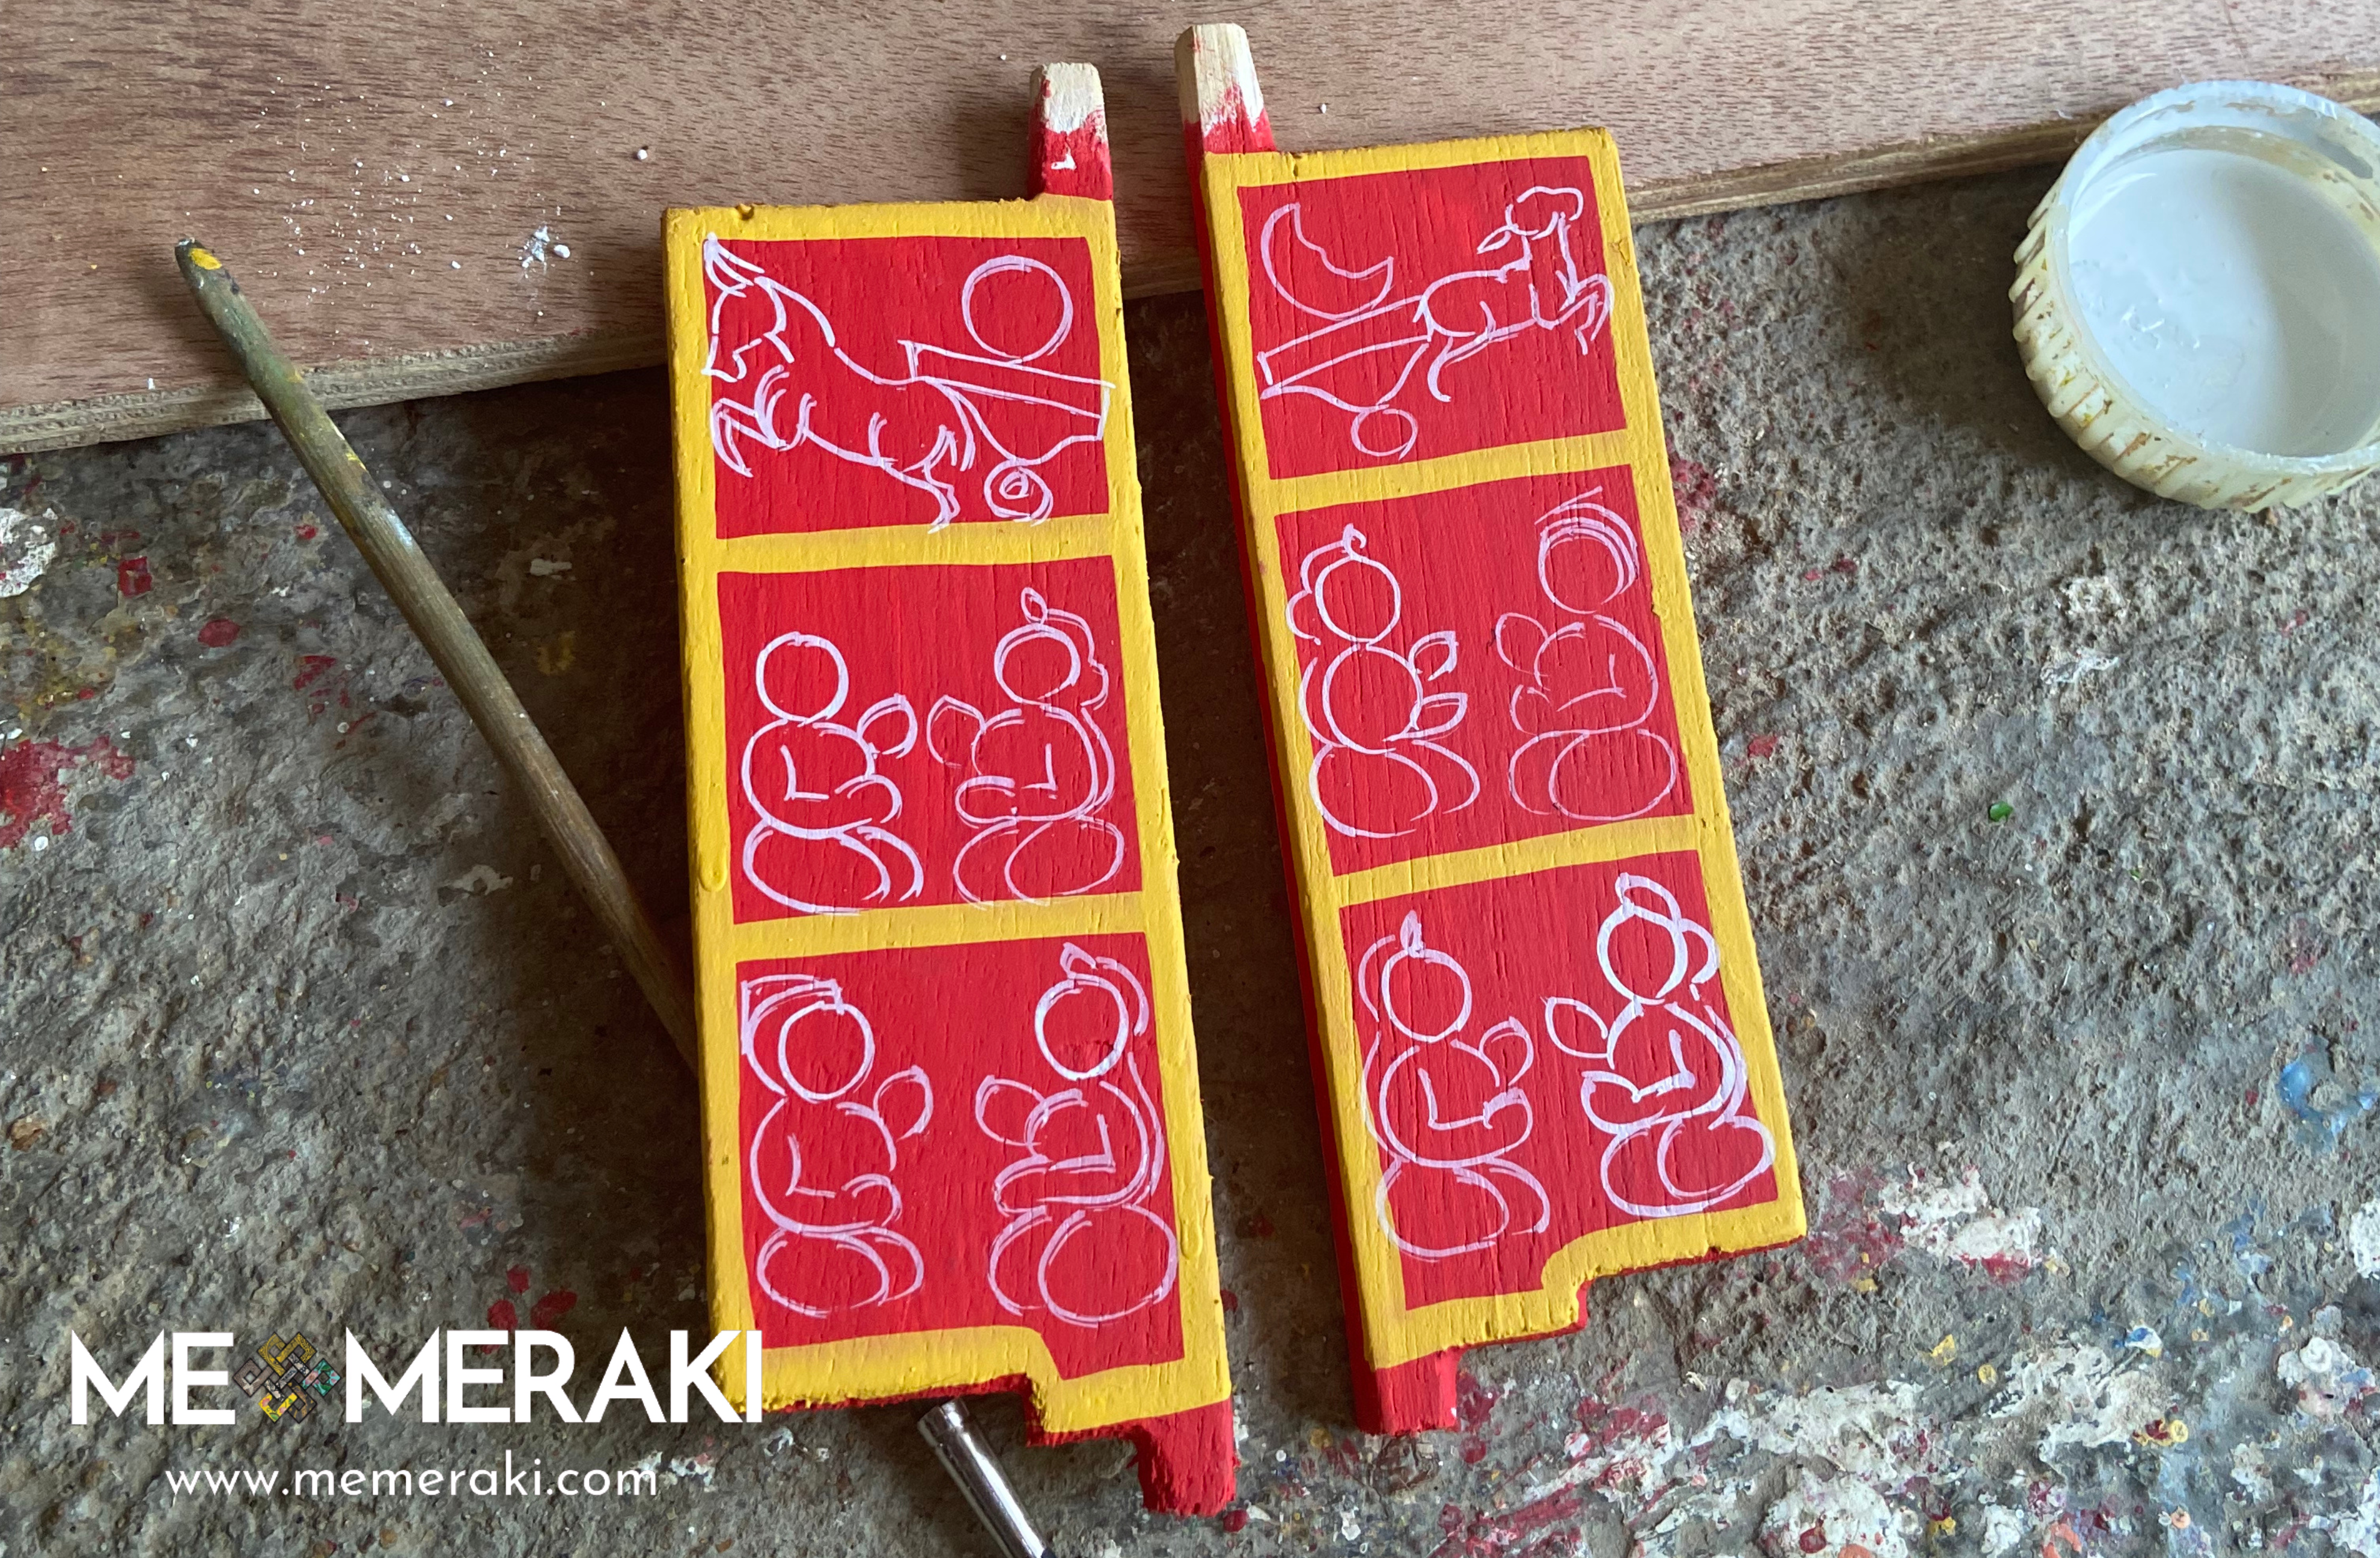
After you have divided the Kavad into sections and marked them with paint, it's time to move on to sketching the story. Novices can use a pencil to sketch out their story, while those more confident in their abilities can use white paint and a paintbrush to make the silhouettes of their characters.
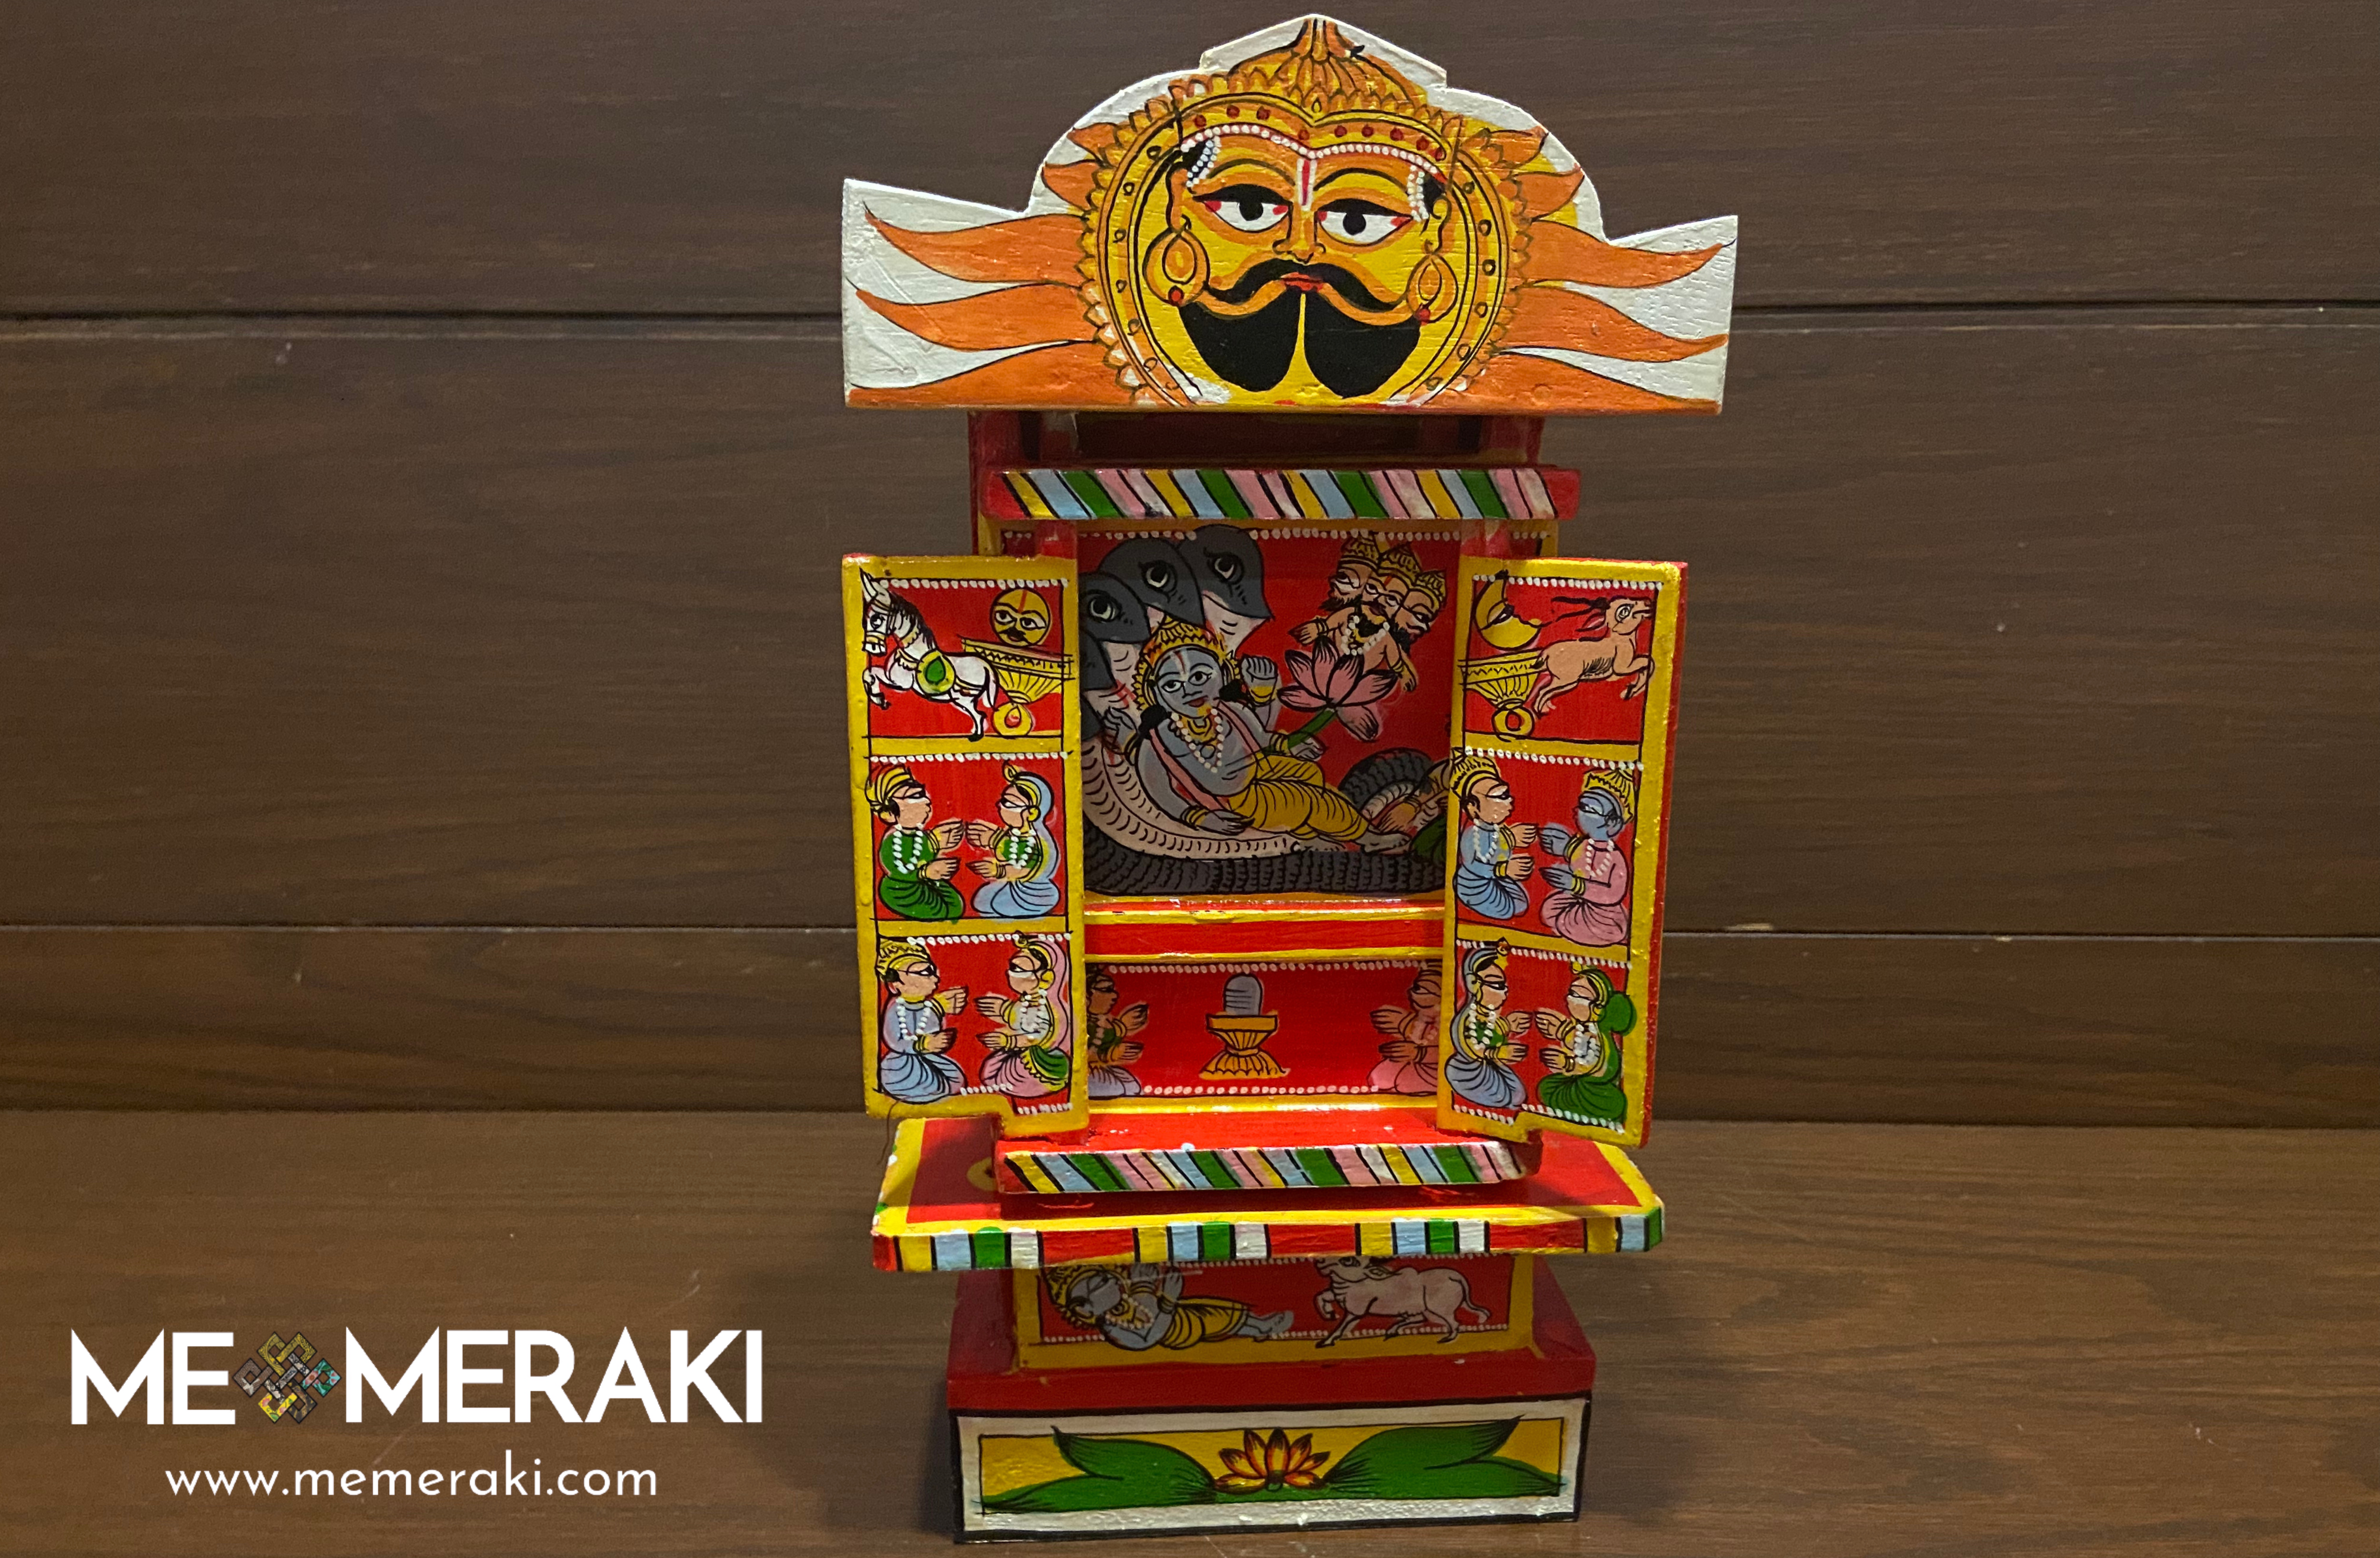
In a traditional Kavad, the first elements drawn are Jaya and Vijaya, who adorn the two front doors. The gatekeeper’s doors are depicted with the sun and the moon, and devotees are drawn below them. When a Kavad is depicting a legendary saga or a mythological tale, different doors of the Kavad are used to depict different stories. Satyanarayan’ Suthar's classic Ram-Krishna includes folk stories like that of Shravan Kumar and Mira Bai. It includes important religious events such as the first meeting of Shri Hanuman with lord Rama, the kidnapping of Sita, Krishna crossing the Yamuna, Putna Kaand to name a few.
If you are not creating a religious Kavad, then you will need to sketch out all of the characters that will be featured in each section of your Kavad in a sequential order.
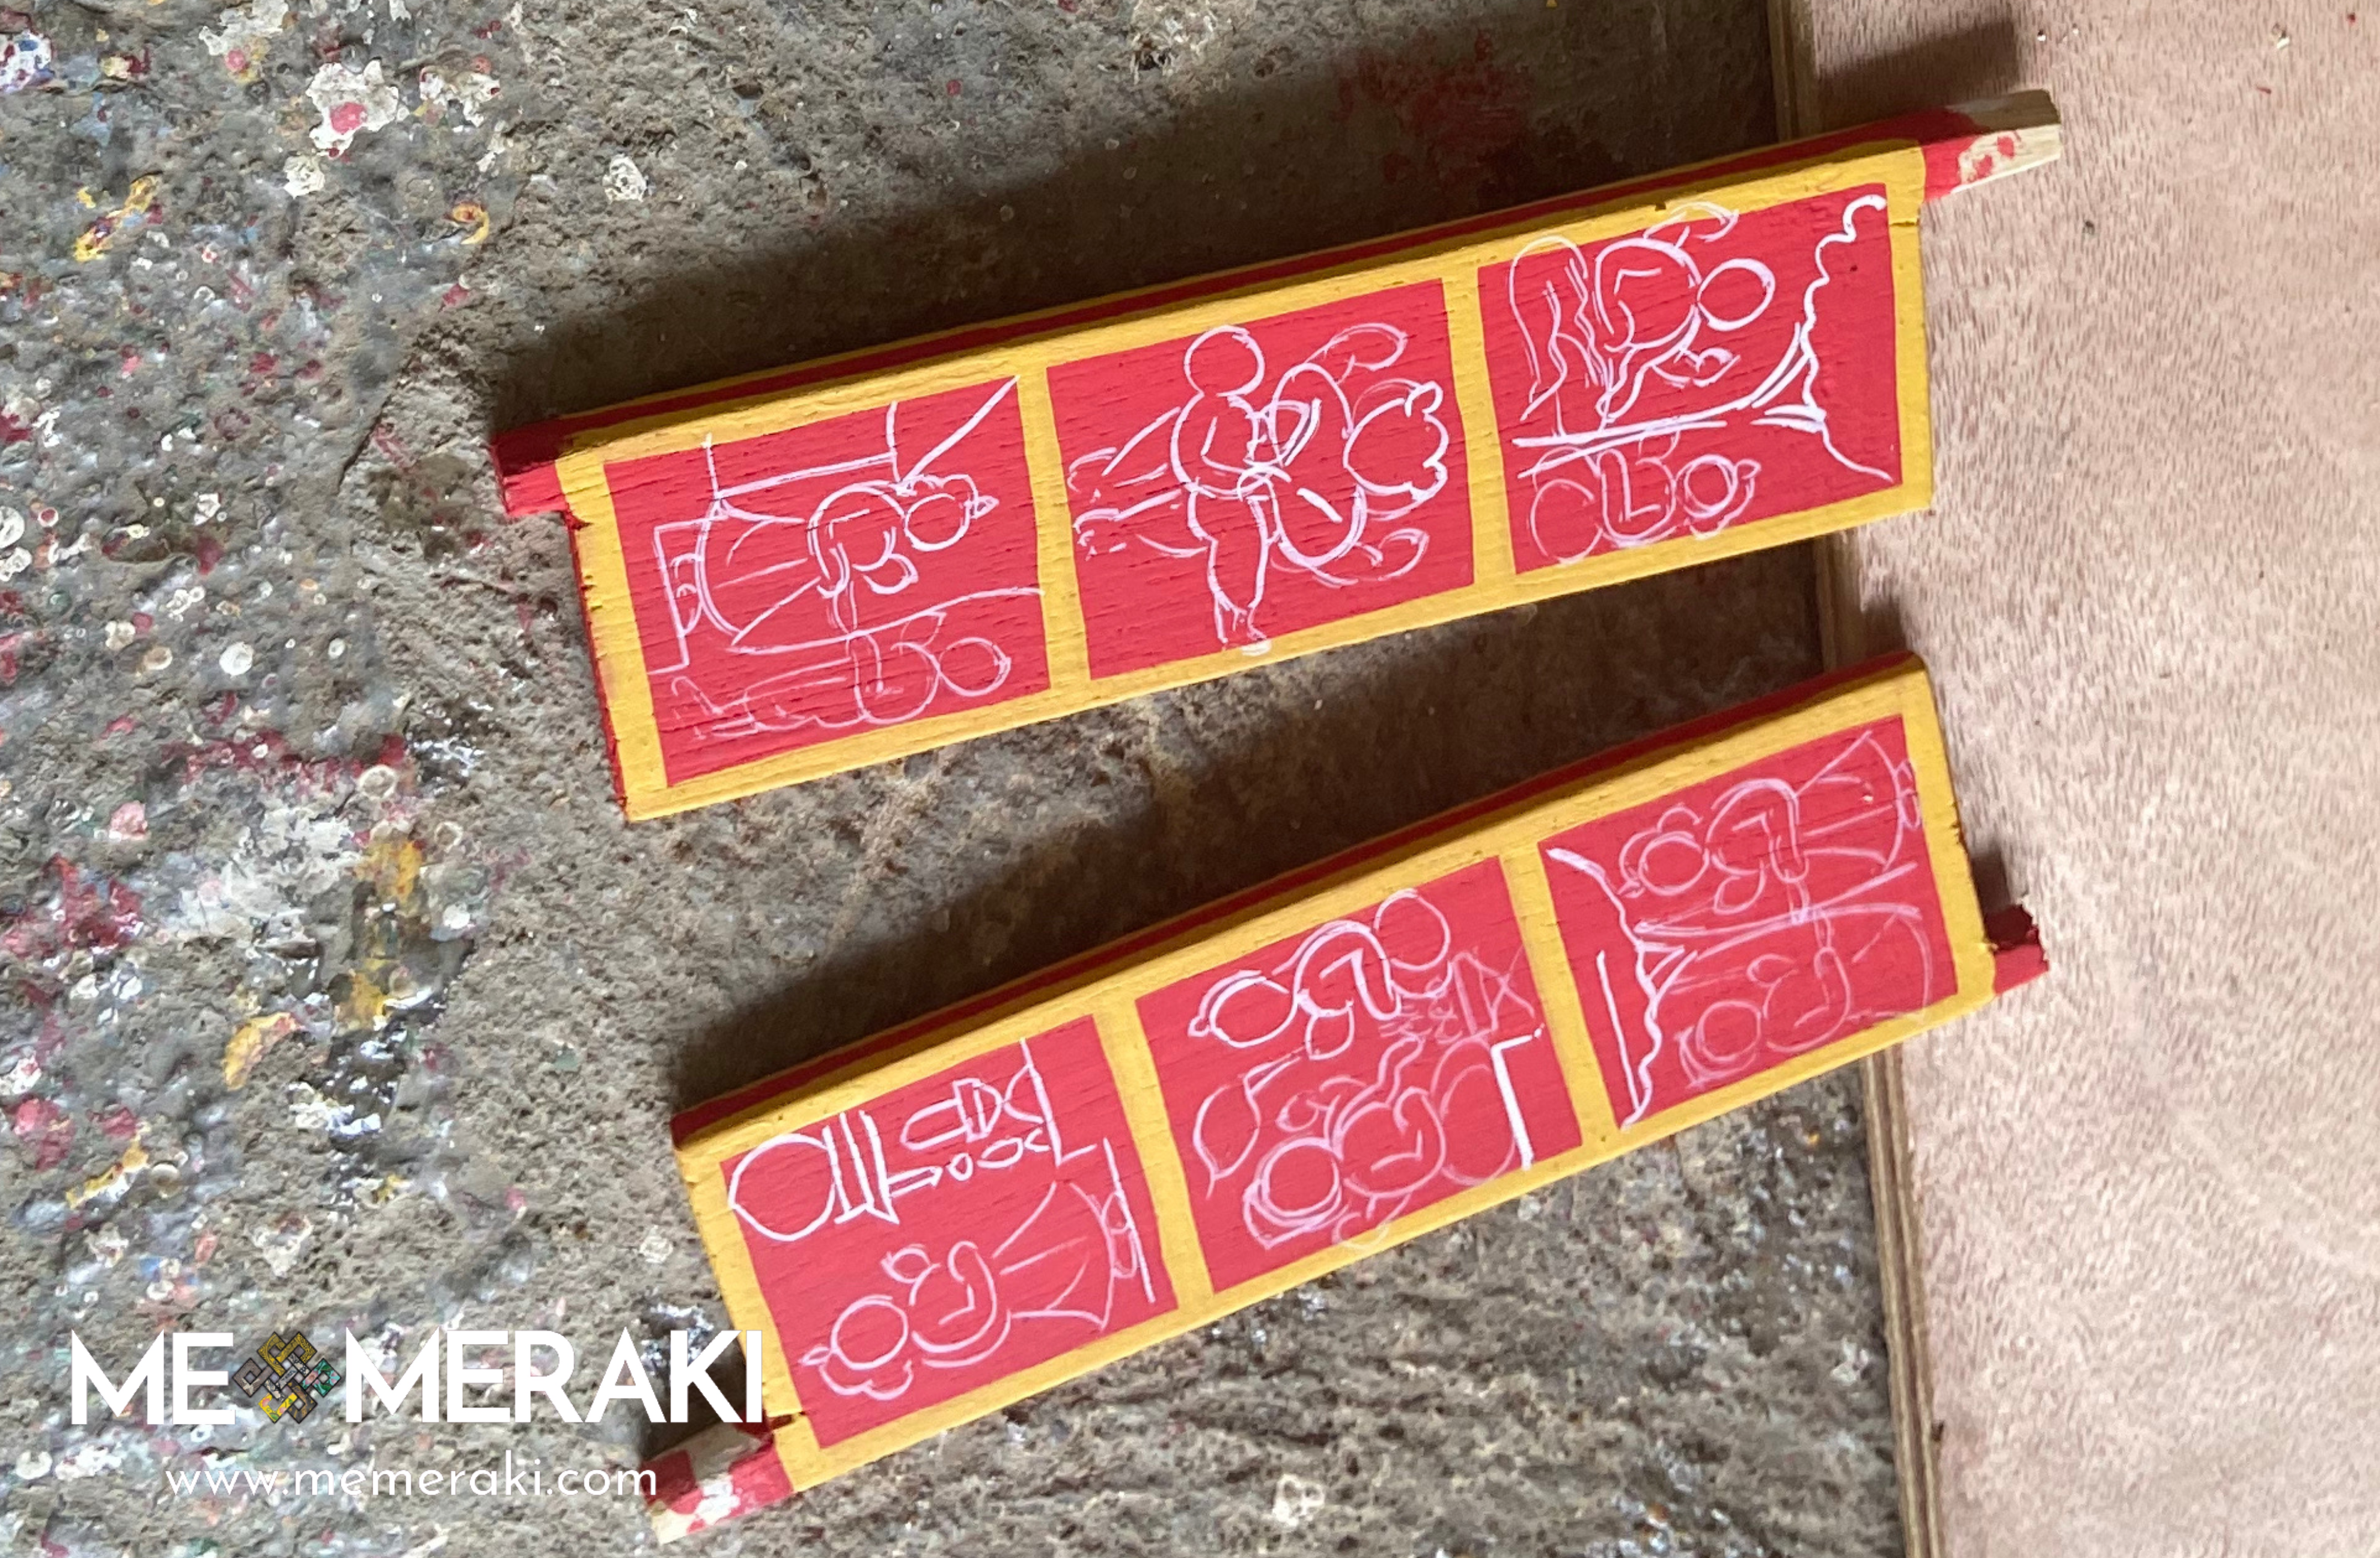
Did you know that skilled Kavad artists do not sketch their characters beforehand? Instead, they begin by making colored shapes directly onto the Kavad and gradually shape them into recognizable characters as they work.
6. Applying Colors: One at a Time
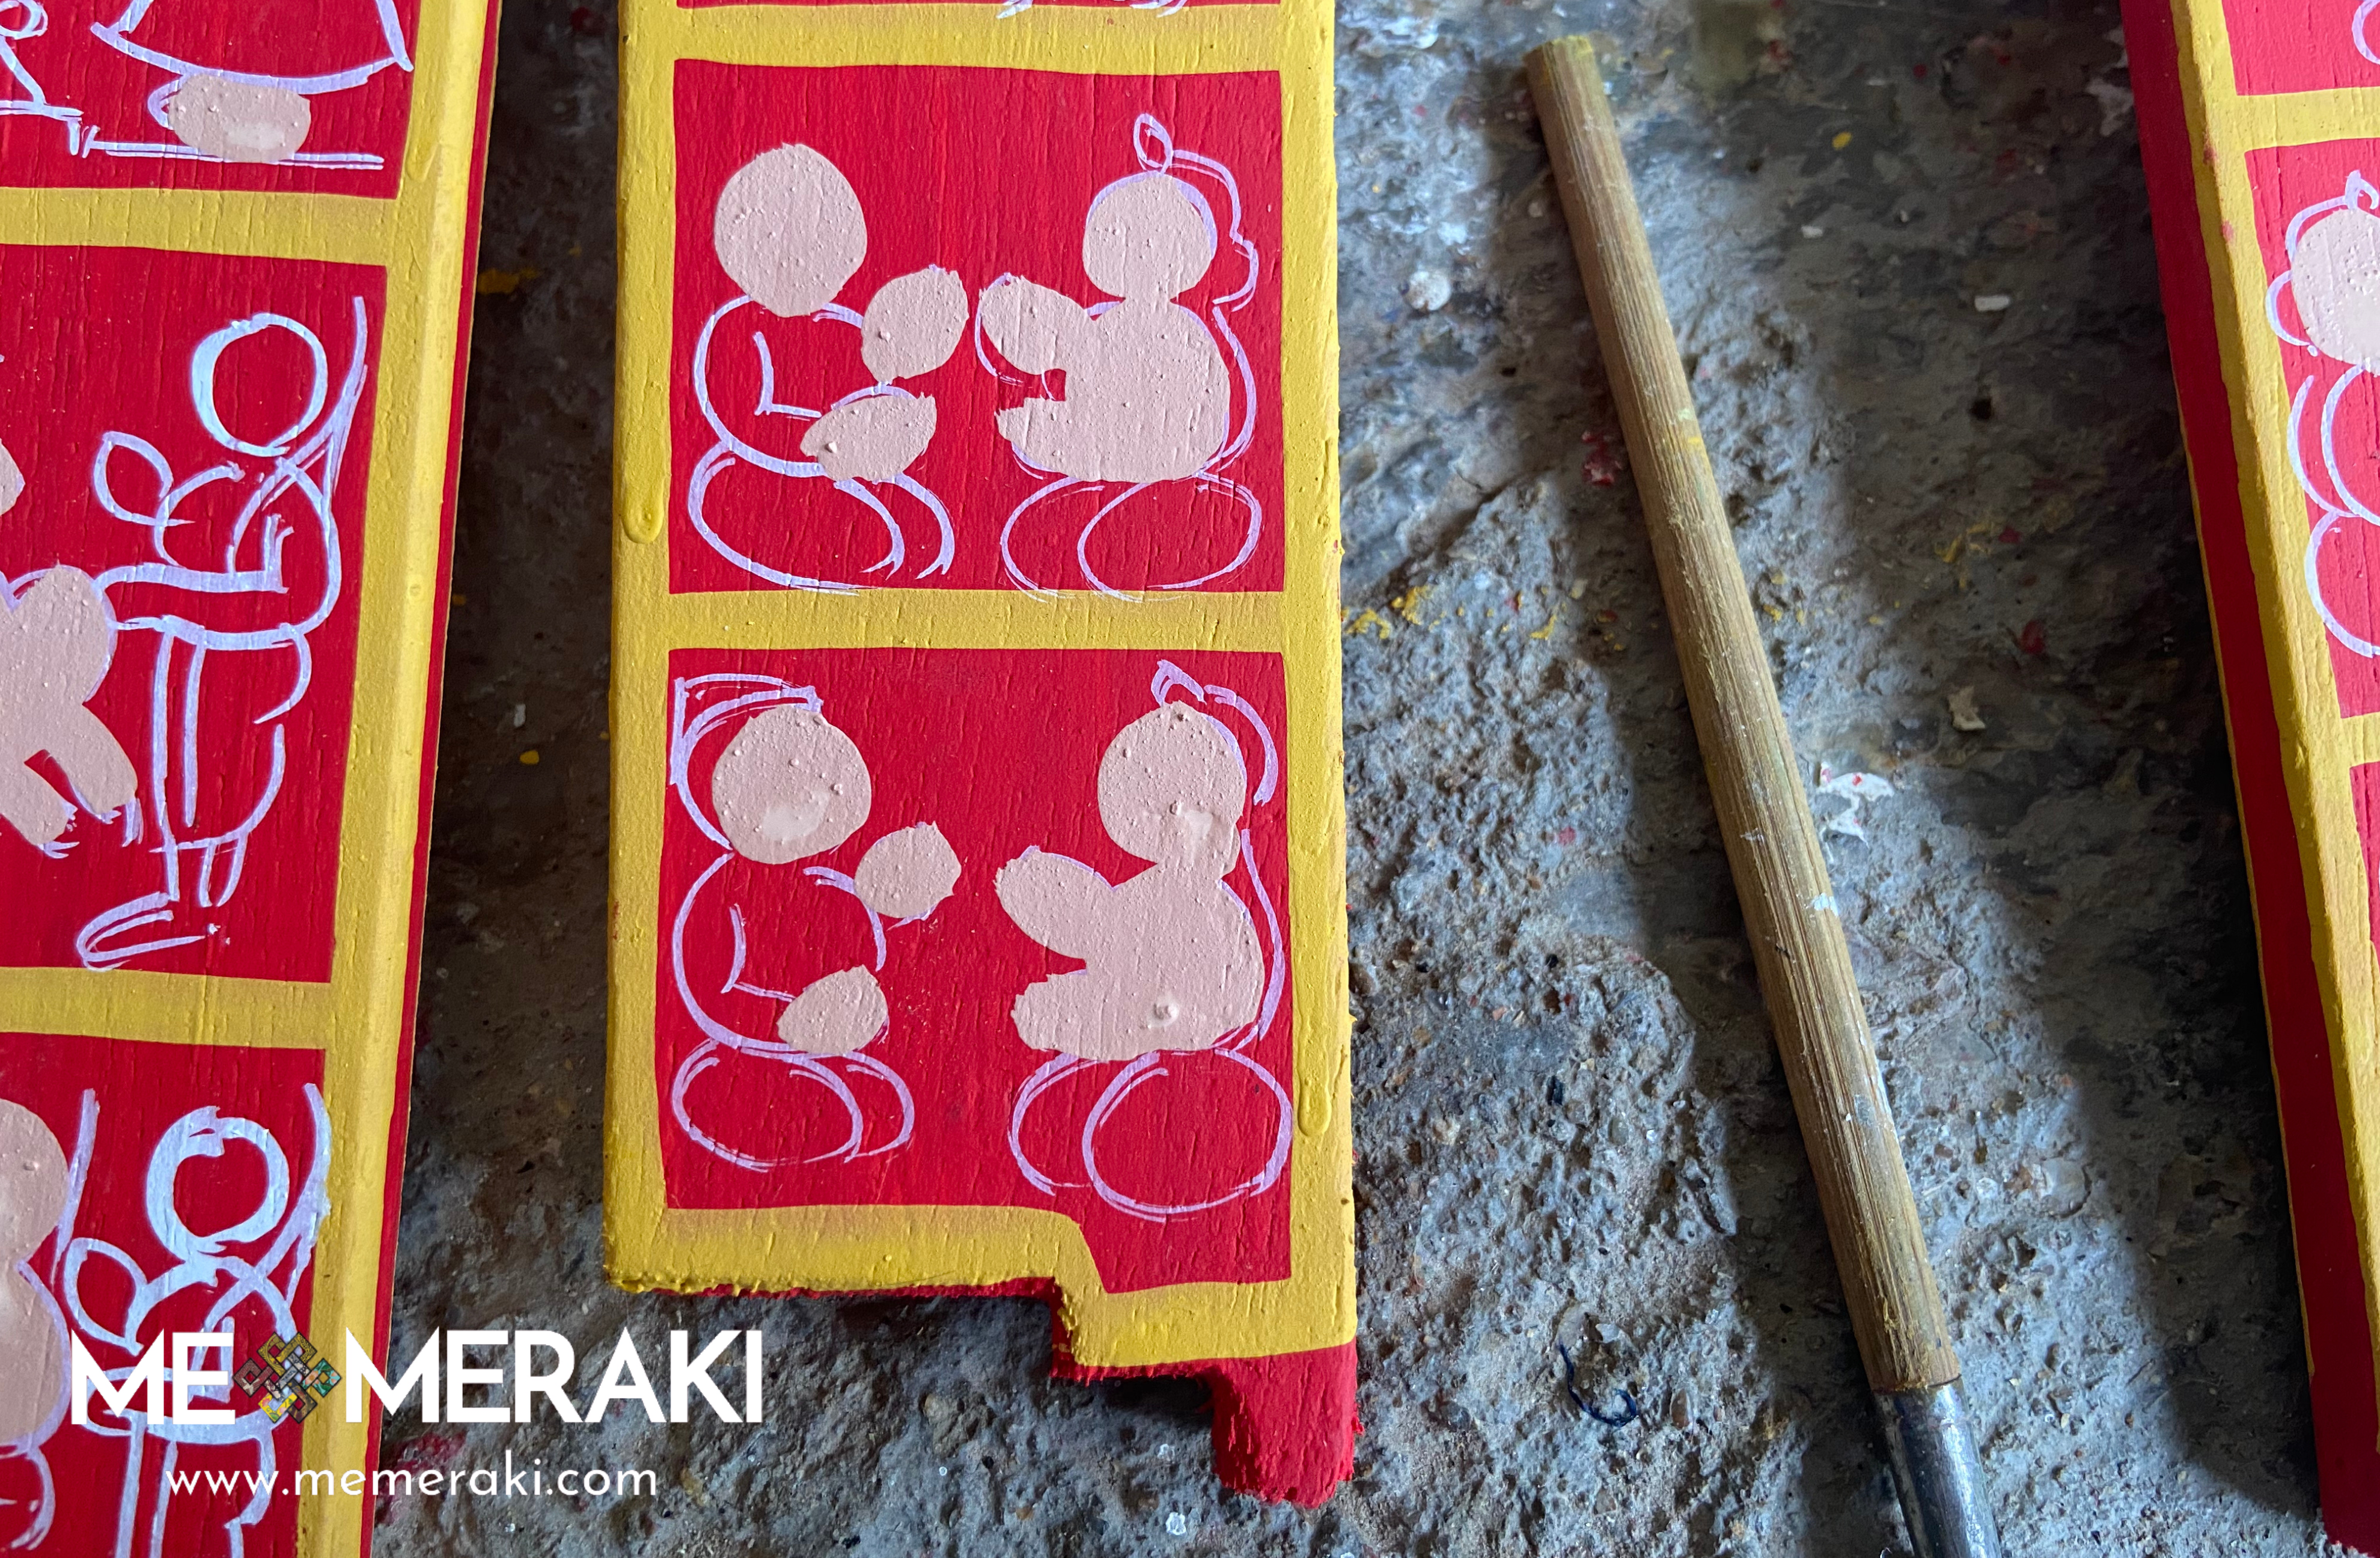
Traditionally, stone colours are sourced from Bhilwara to paint Kavads. These colours are mined and processed over a period before they are ready to be used in the paintings. In the past, artists would have to grind stones into powder and make their own colors, but now they can purchase powdered stone colors from a handful of suppliers. The colors are mixed with gond, a natural glue and binder, until it has a visible shine.
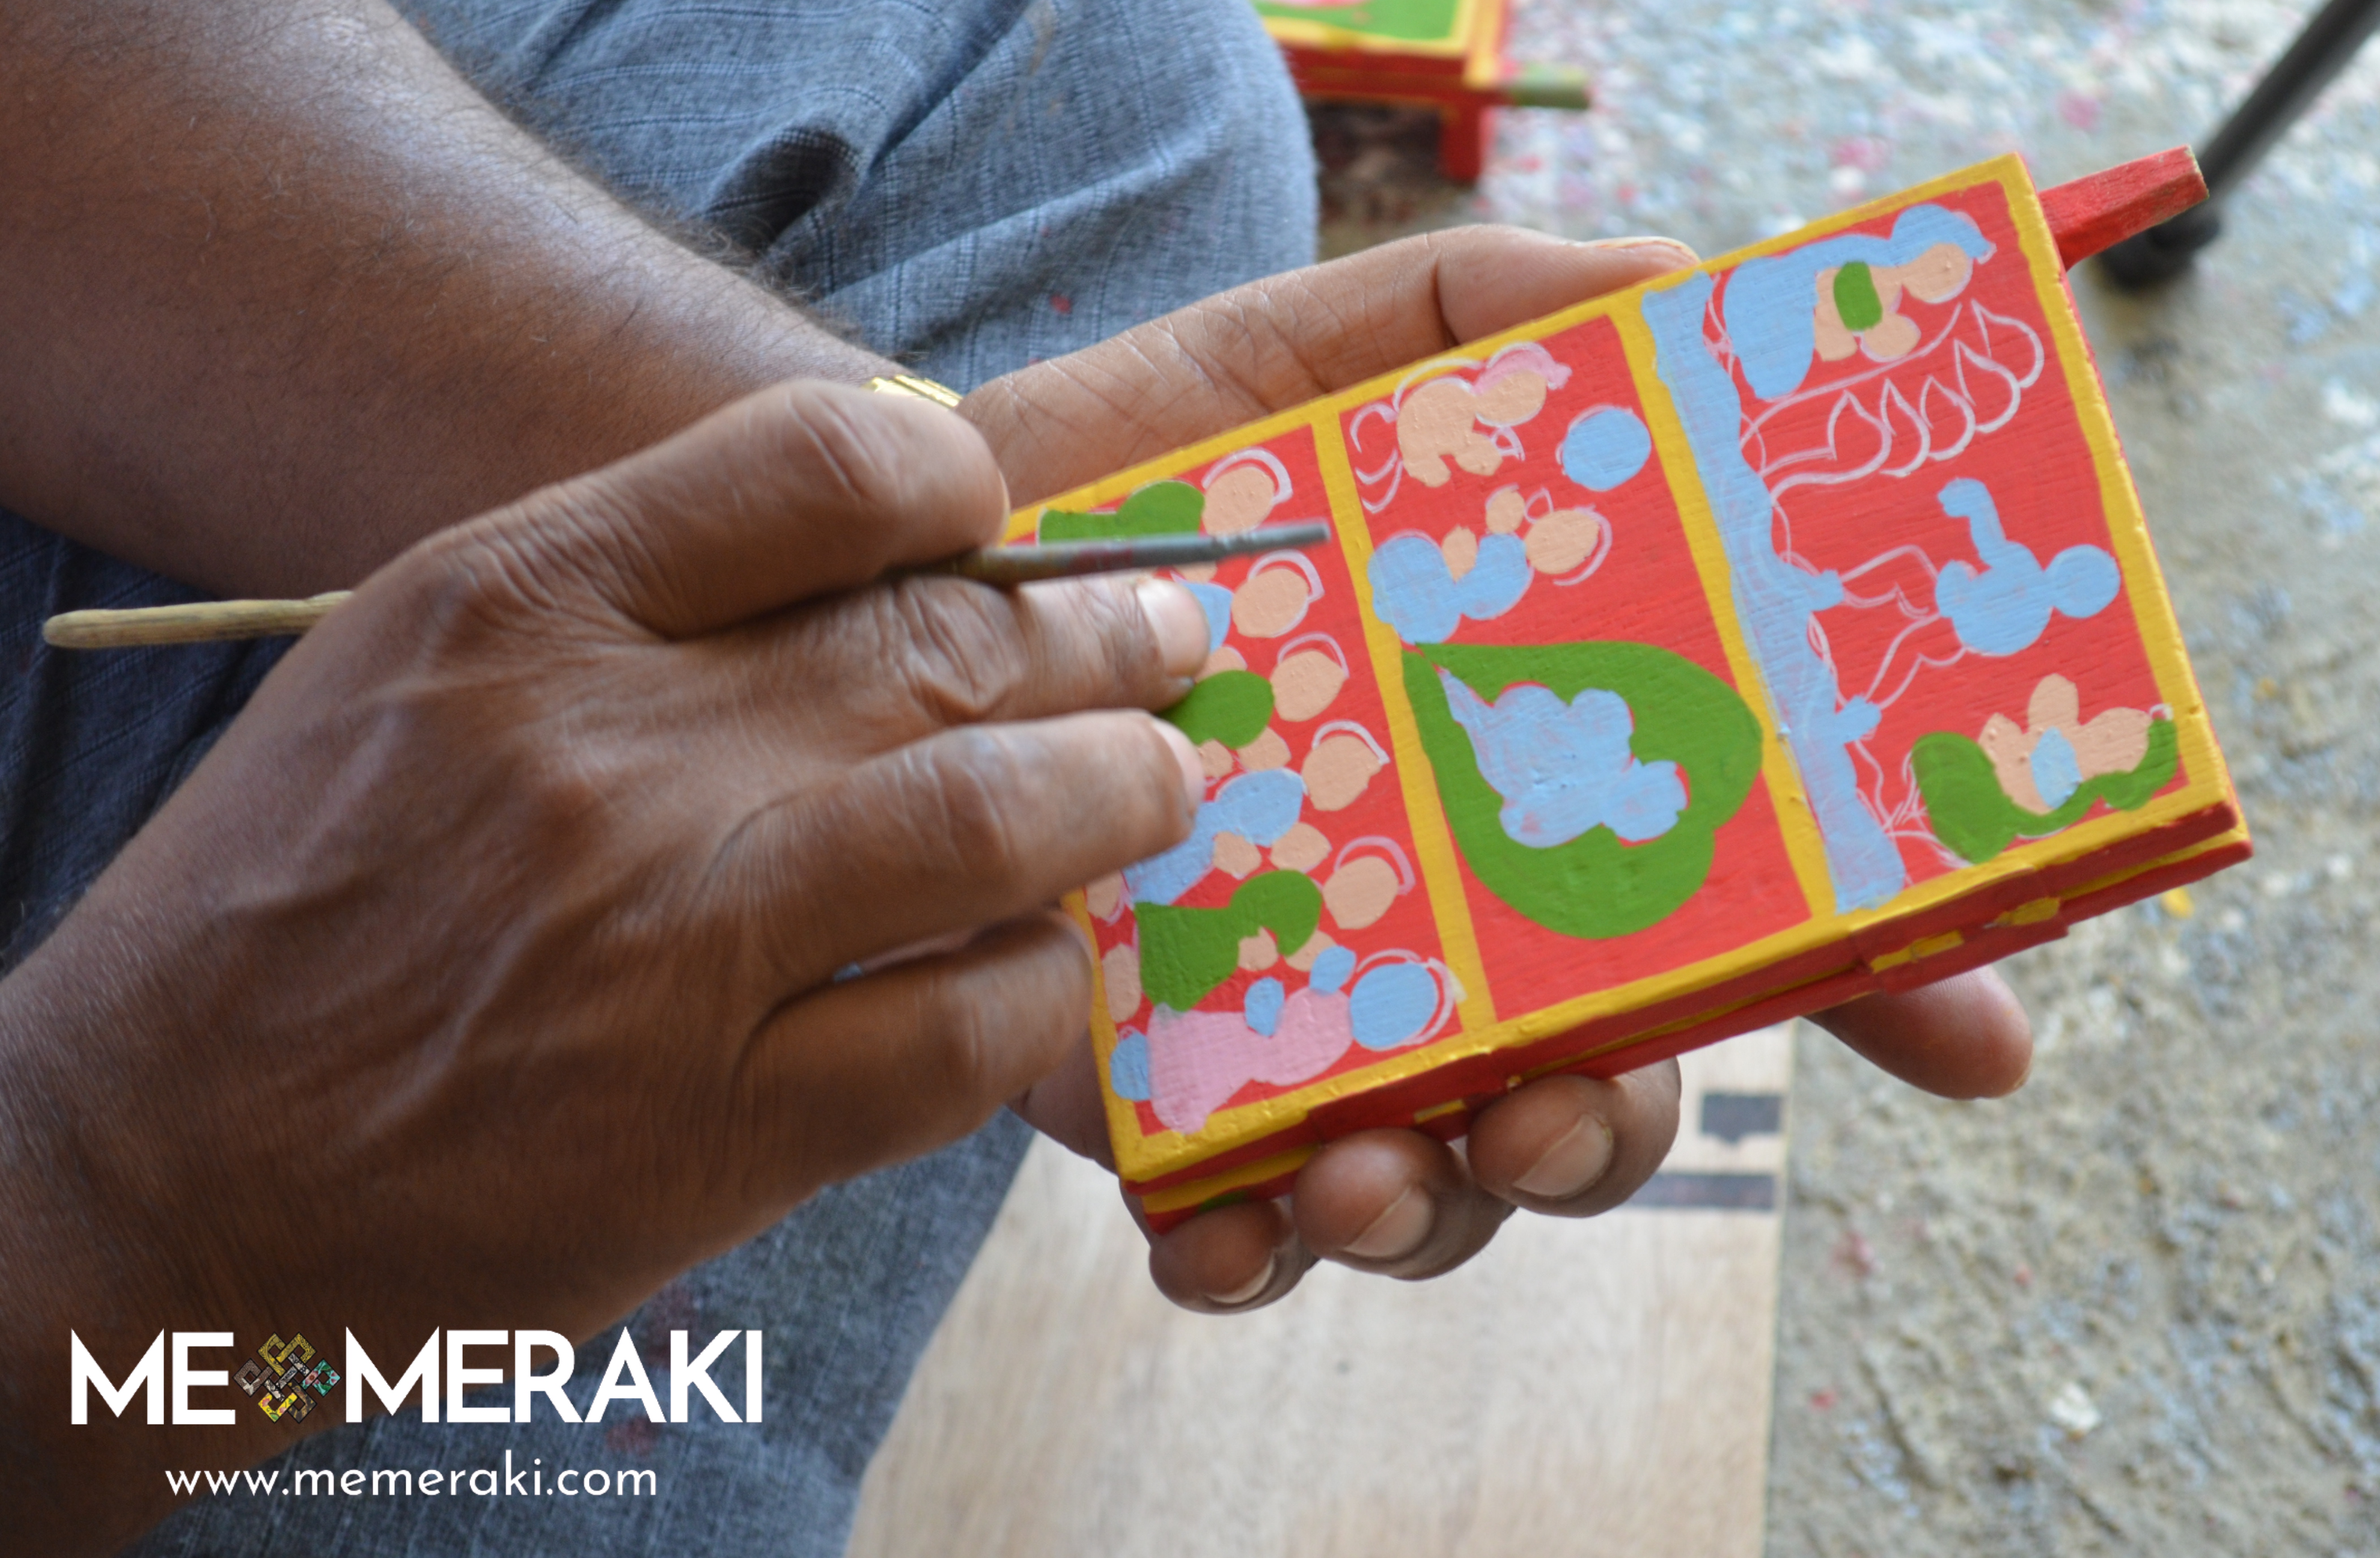
When you start painting your Kavad, remember to use only one colour at a time. Water-based and will mix together if applied while still wet. To avoid this, it is necessary to wait for each color to dry before applying the next one. To save time, one colour is applied on the whole Kavad rather than one section before moving on to the next. We recommend you do the same.
5. Outlining
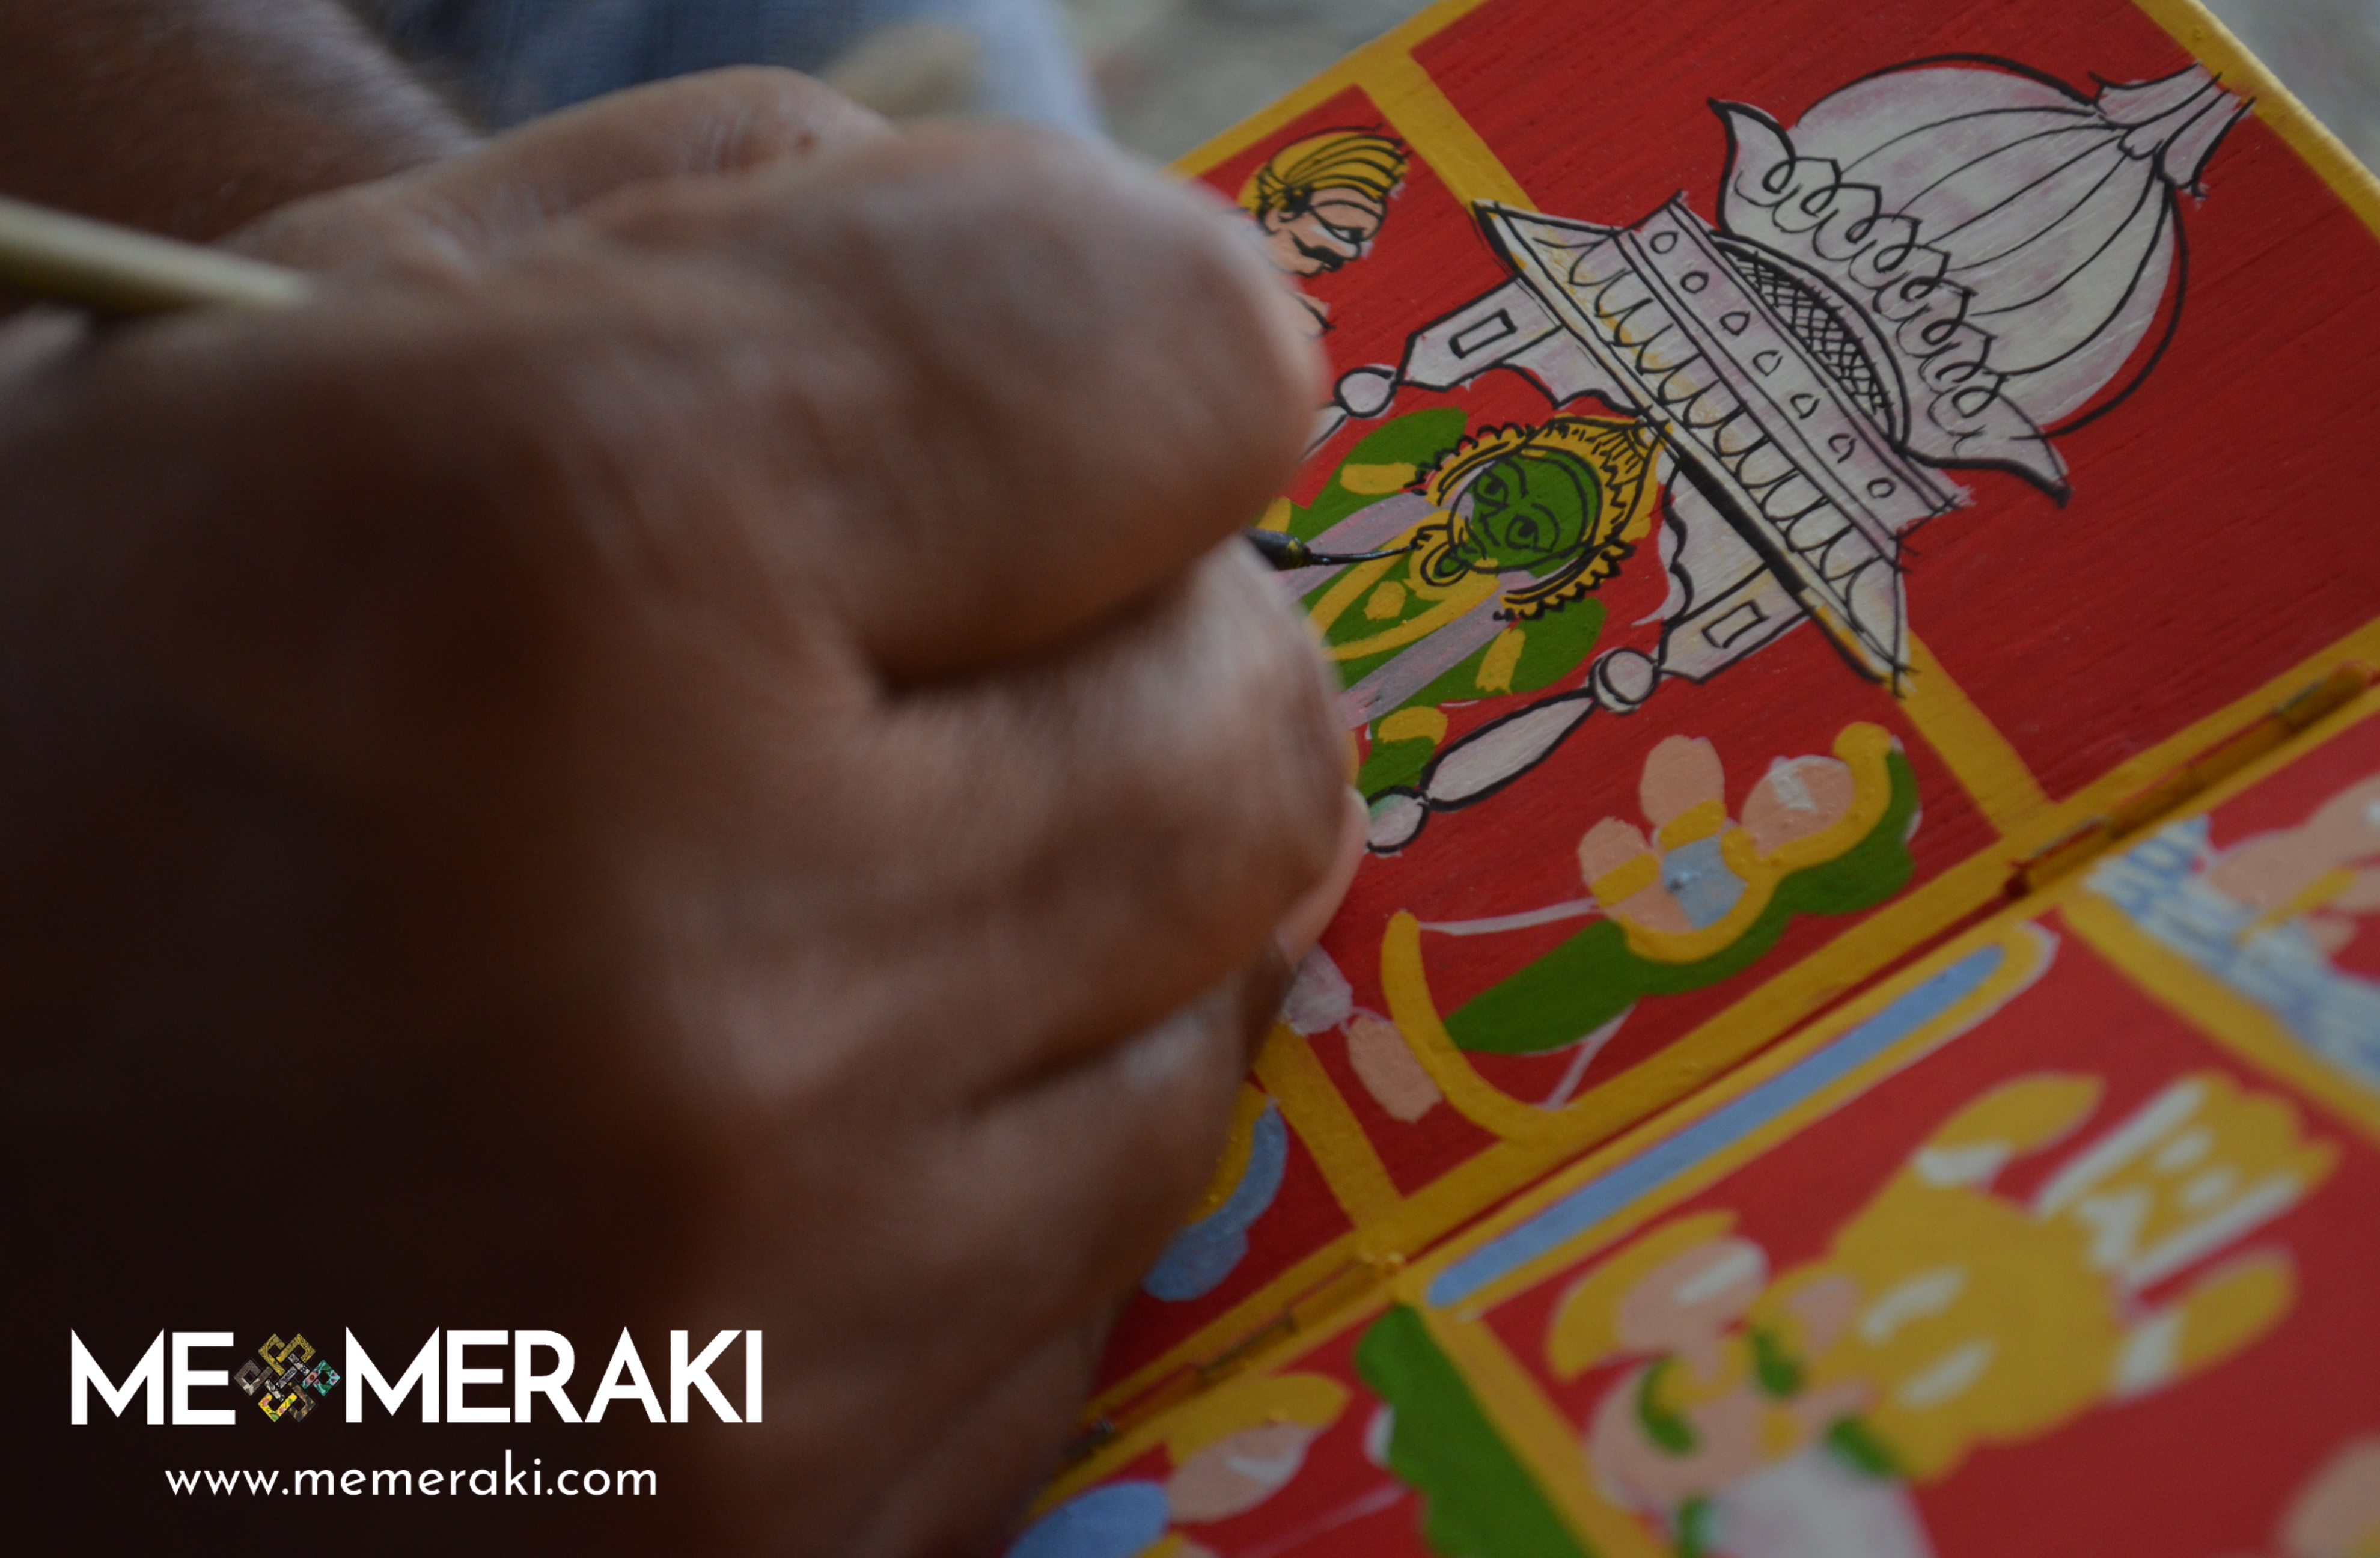
After sketching and painting all the sections of the Kavad, the next step is to outline the paint with black using a technique called syaahi work. Black outlining is a crucial step in the Kavad painting process, as it distinguishes and adds intricate detail to the elements painted on the Kavad. By highlighting physical elements with black outlines, the entire painting comes to life. A 0 number brush is used to carefully apply the black outlines, which requires a steady hand and attention to detail.
If you are sketching your own story onto the Kavad, then you will have to carve out your own details in the characters. This means that you will have to decide on the features that will make each character unique and recognizable.
6. Finishing

Once the black outlining is complete, a saffron colour is prepared which is used to give the final touches to the sun god in the traditional Kavad. Red is then used for the tilak, ornaments, lotuses, lips, and other adornments. This is followed by white stippling on the borders of the sections and the sides of the Kavad. This provides a fine level of detail and completes the overall look.
The final step is to apply varnish to preserve and enhance the colors and texture of the artwork. Varnish creates a protective coating between the artwork and external factors such as dust, dirt, and moisture, which can cause discoloration and damage over time. Traditionally, gur and lac were processed together to make this coating. However, today most artists use commercially available varnish.
After the varnish has dried, the final step is to assemble the Kavad. The panels are attached with hinges and the Kavad can be opened and closed like a book. As you open it, you will reveal the intricate and vibrant artwork that you have created.
Congratulations! You have completed the final step to building your very own Kavad masterpiece! If you would like to learn more about this craft and its history, or improve your painting and detailing skills, we recommend joining our Kavad Masterclass with Satyanarayan Suthar. Our expert instructor will guide you through everything from the basics to the advanced steps. Additionally, you can purchase the Kavad Craft Kit from our website to get started on your next project. Happy crafting!


